Monday, June 21, 2010

Antiquing Maps

When I did Lori's Books, the map for the cover didn't fit with the rest of the book. So I antiqued the map to make it look older. I used distilled water and acrylics and brushed a thin layer (as thin as watercolor) over the top of the map. I liked the cover insets so well that I decided to do the same antiquing on the end papers on the inside.


I did a large sheet of it but this was a left over piece that I used for a pocket on the back inside cover. It held the colophon for the book. This photo below shows the paper before I cut out the pocket. You can see the difference of the bright blue paper and the antiqued greener (beautiful,beautiful) paper.


I may never be able to use this paper again without antiquing it first!

Friday, June 18, 2010

Chocolate Ice Cream Beard

We're heading to Provo for the bookbinding class on Saturday. Today is family time though and my two boys get to visit with their grandparents and their aunt Haleigh. Their aunt Calixta and cousin Delia Mae will be in town so they get to see them as well.


Jadon loves Haleigh. I think it's because she give him ice cream every time we visit.


He has such a man face as it is but check out that chocolate beard and serious look.
Mister Jadon is three years old.

Thursday, June 17, 2010

Book Swap May 2010

This is my book for the book swap that BEST (Bookbinding Etsy Street Team) did just recently.

My book went to Hilke Kirzke of Buechertiger who lives in Germany. She received the first book in the series. If you would like one you can purchase one in my Etsy Shop.

Wednesday, June 16, 2010

Handmade paper on handmade books is lovely.

New photo album in the shop! This photo album holds quite a lot of photos. You can use photos corners or glue the photographs right into the book. There are no plastic sleeves just beautiful paper.

This is the back of the book (just as lovely as the front) which has a soft brown leather spine with embossed hinges.


This shows the inside covers. Beautiful paper!


This photo shows the glassine interleaving between the heavier pages. The glassine is meant to keep your photos from sticking together when placed on facing pages. 

Monday, June 14, 2010

I cut the paper for my books with a butter knife. Seriously.

Daniel took this photo of me a few years ago. I'm tearing down pages for a book at the kitchen table. You can see the bonefolder and the non serrated butter knife that I got from the thrift store. This is how I cut my paper down for years. Last year, I called around to a few places to price out paper and found a company I could buy wholesale from. I was talking with the salesman on the phone while he looked up prices for me. So he was just making conversation as the computer was loading the information for 1000 sheets of Mohawk Superfine that are 25" x 38"

Salesman: We usually deliver to large companies. You say you're out of your home?
Me: Yes, I sell handmade books online and I just work from my home.
Salesman: What do you use to cut down all that paper?
Me: I cut it at my kitchen table with a butter knife.
Salesman: (after a pause) I'll have to call you back since I don't have the prices right on hand.

He never called back. It wasn't until later that I figured out that he probably thought I was a prank call or something. I found a different company to work with though and I'm very pleased with them.

I've also recently switched over to a tear bar and I've been so happy with it! I still use the butterknife occasionally but I could never go back to make hundreds of books with it again.


Saturday, June 12, 2010

Scandinavian Festival


Jim and Barbara Cowlin stopped in at our booth at Scandanavian Days. They are taking a trip on US Route 89 and blogging about their adventures along the way. You can check out their little run in with me on this blog post.

I swiped this photo of me from their blog. It's the only one we have of the booth I think. It was super windy and so we had to be careful on our display. The containers all had lids kept under the table which we could just throw on in case of an extra long wind burst or rain. Luckily, we didn't have any rain and Saturday wasn't as windy as Friday. Friday, we weren't even able to keep the canopy up.

Friday, June 11, 2010

Tea Staining Archivally


So, I've had real issues putting nice clean archival paper into tea and making it acidic just for the wonderful effect of my making it look old. This was the end of my trial process in trying to figure out how to do it archivally. At first, I tried using my archival printing inks. I mixed (a TON!) of ink trying to get the color right. The color always looked nice on the glass and in the pan when I mixed it with ph neutral water, BUT when I dipped the paper in and baked it, it would always have way too much blue. It also didn't give the same effect as the tea. So, I scoured the internet again looking for information and I talked with Daniel about it. He's been looking into archival papers lately because he's been doing illustrations for kids. I learned a few things from talking with him and I came to understand how to go about making archival tea stained paper. Because our environment is naturally acidic, 7-8.5 on the pH scale is considered archival. Overtime things in the environment will pick up the acidity and become less alkaline. Some papers are buffered with Sodium Bicarbonate for this very reason. So...I tried adding a little sodium bicarbonate (baking soda) to my tea/water mixture and tested it to make sure it was archival. Voila! Tea stained pages with a neutral to alkaline pH. I'll get a tutorial up of this soon.

Thursday, June 10, 2010

Coptic Stitch Class in Ephraim, UT on Saturday!

I'll be teaching the Ethiopian Coptic Stitch at the Central Utah Art Center on Saturday. The class goes from 12-4pm and the cost includes all the materials you'll need to make your book. You design it with paper or leather.


The coptic stitch book will open flat for maximum use of the pages. It works great for sketchbooks, photo albums and journals. It's also a nice book for recipes because you don't have to hold it open while cooking in the kitchen.

For more information about the class visit The Central Utah Art Center's website here: http://www.cuartcenter.org/education

Wednesday, June 2, 2010

200 Books in Two Weeks...phew!

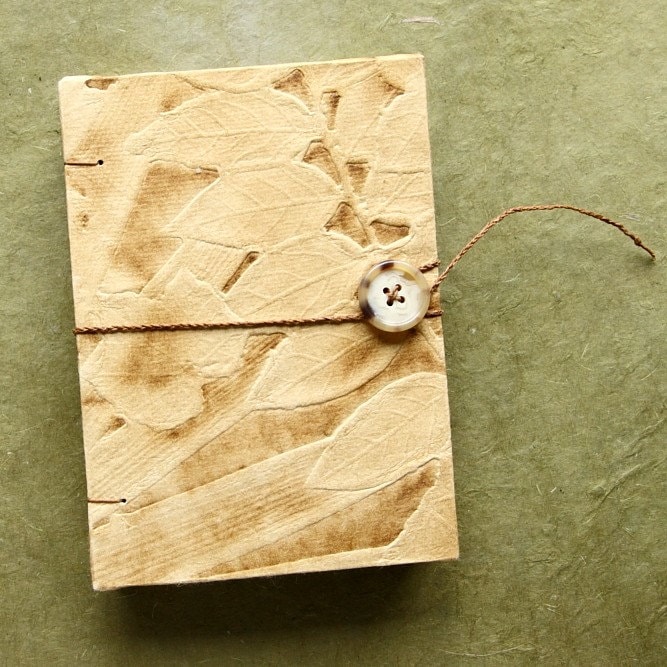
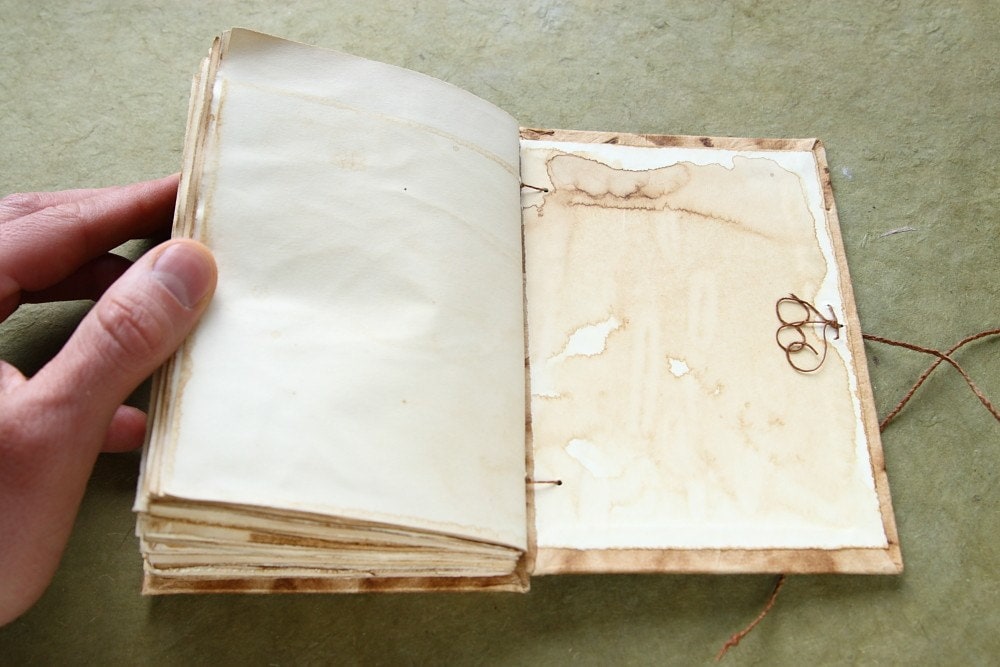
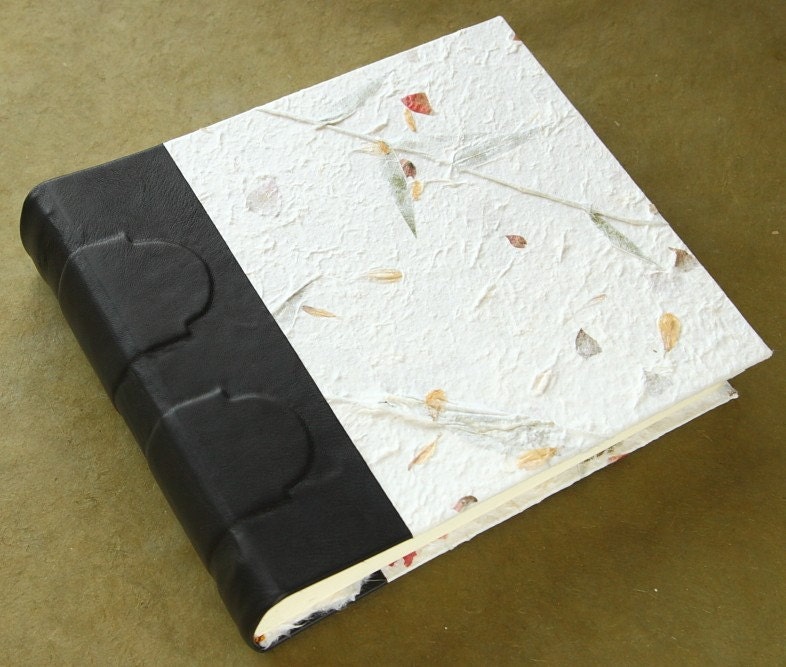
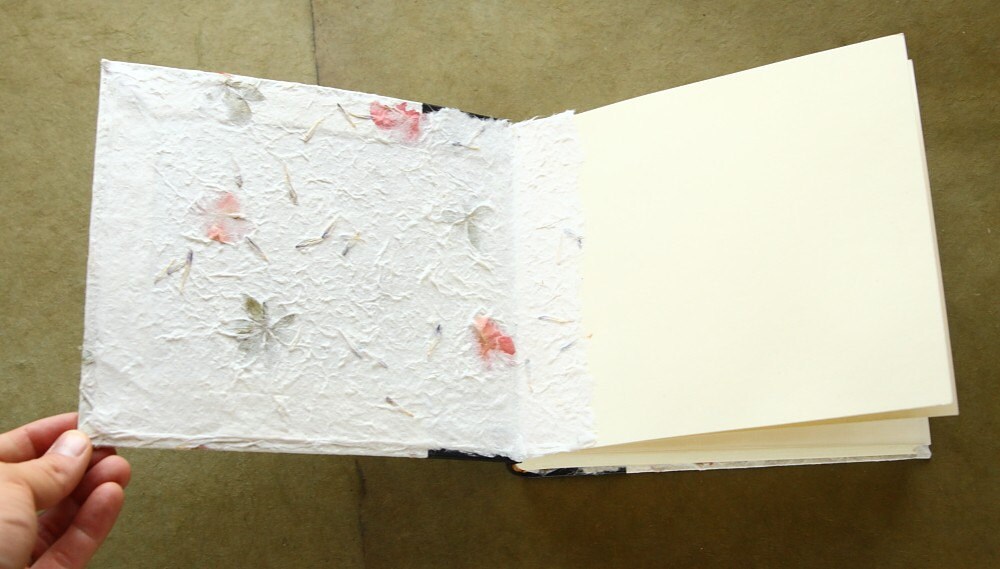
We did a booth at a local festival this last weekend. My original guess of how many books we'd need was 800. I figured that we could fit 8 shallow boxes of books on two tables and leave room for Eric (brother-in-law) to put his paintings on the other side of the tent. The shallow boxes ended up only fitting about 40-60 books per box instead of 100. And we ended up with less table space than I thought. In the end, we ended up with just over 200 books.

We made 200 books in two weeks! Yes, we did. The festival wasn't the greatest venue and we only made a handful of sales but Eric did really well with his paintings and prints. You can see some of his work on Daniel's blog here.

I've been super busy lately with this festival bookmaking, teaching bookbinding classes, organizing a collaborative book arts project, taking care of the Etsy shop, custom orders and being a mom of two cute but sometimes crazy boys.

As I was making dinner last week (after a full day of cutting paper and chasing after little boys) I opened a can of tomato sauce and this is what happened.


Yes, you may laugh. I did. And Daniel had to take a photo because that's what we do. Laugh and take photos.

I only sort of wish life would slow down but not really. I enjoy the busyness of life, even if it sometimes throws tomatoes at me.