Friday, March 30, 2012

Bookbinding 101: Needles

We use two kinds of needles, straight and curved (we'll teach you how to make your own curved later in this post). Which one we use depends on the book structure we're working on. Curved needles work very well when sewing a coptic stitch, while a straight needle works great on a long stitch. You can make either book with either kind of needle, but we find it much easier using curved for coptic, which we find also allows for the binding to be tighter, and we find it less awkward to use straight needles on something like a longstitch.

The curve allows you to "hook" around as you are sewing. The photo at right should get the idea across.

Curved needles are pricier in the U.S. than are straight needles, at least as far as we've found. However, for those in the U.K., Shepherds Falkiners sells straight and curved for the same price. Not sure what the sizing numbers mean over at Shepherds, but in the U.S. we use the darning #1, which we use for sewing 3-ply (3 cord) linen thread and as thick as 6-ply. In the U.S., both straight and curved needles are available at Hollanders and Talas.

You can also make your own curved needles out of straight ones. How to do this is explained after the jump.


To make your own curved needles, you just need a candle, and two needle nose pliers.


Holding the needle with pliers on both ends, bend it ever so slightly as the needle starts to heat up. It only takes a few seconds.


An angle that is slightly larger than 90 degrees works well. Remember that the needle will be hot, so place it on a heat-resistant surface to cool down once you've bent it to the angle you'd like.
The needle will have soot on it so remember to clean it off with soap and water before using it to sew your nice clean pages.

A little trick to help in pulling the needle and thread through a tight hole is to grab the needle with a balloon. We keep a bag of water balloons on hand for just that purpose. That's unfilled water balloons, in case you were wondering (you never know). You may also find it useful to use a pair of small needle nose to pull the needle through.

Anything to add to the discussion? Please leave a comment.

Thursday, March 29, 2012

Book Art Workshops
Los Angeles, CA
May 7 - 12, 2012

Workshop details

For 2 weeks only or until spaces are filled, purchase the entire week (6 days, 8 workshops) for only $550!

To purchase, please click the button immediately below - offer ends April 14th:

Wednesday, March 28, 2012

Central Utah Art Center Book Art Classes

Upcoming Classes in April + May
Central Utah Art Center
86 North Main StreetEphraim, UT
.........................................................................................................

        Antiquing Paper + Leather

April 21, 2012
                                           Noon - 3pm

Create beautiful old looking books with new materials. Old books are lovely but most often are not sturdy. This workshop will show you how to antique the materials you work with to create an old world look on your newly bound books. Each student will have the opportunity to create small examples of different antiques to use for future reference as well as learn a variety of paper antiquing techniques.


Students need to bring the basic tool kit but everything else is provided!


Basic tool kit: Scissors, Pencil, Metal edged Ruler, Bonefolder, 1" flat brush for glue, Bookbinding Awl, X-acto type craft knife with extra blades and a Cutting Mat or old magazine to cut on


.........................................................................................................
Exposed Stitch Books

April 28, 2012
10am - 4pm

Celebrate the diversity of spines by creating 3 books in this 6 hour workshop! Accordion Spine Hardcover Book, Anne Goye's Secret Belgium Binding and the Double Needle Ethiopian Coptic Stitch.


Students need to bring a sack lunch and the basic tool kit but everything else is provided!

Basic tool kit: Scissors, Pencil, Metal edged Ruler, Bonefolder, 1" flat brush for glue, Bookbinding Awl, X-acto type craft knife with extra blades and a Cutting Mat or old magazine to cut on


Purchase the class for $60 now through Paypal by adding it to your cart or email KarleighJae@gmail.com to register and pay via mail/in-person.


.........................................................................................................
Cord Bound Books 

May 19, 2012
10am - 4pm


Create a Traditional Quarter Leather Cordbound Book using modern methods and tools. The cordbound book dates back to the 5th century and were introduced when Byzantium monks established their first scriptorium, Byblos, in modern Lebanon. The Arabs were the ones to bring this style to life with all sorts of decorative work, gorgeous gold embossing and clasp closures. They still make the most wonderful cordbound books in the world. With your choice of leather and papers from around the world, you’ll create and keep your own cordbound book.


Students need to bring both a sack lunch and the basic tool kit. Everything else is provided!

Basic tool kit to bring: Scissors, Pencil, Metal edged Ruler, Bonefolder, 1" flat brush for glue, Bookbinding Awl, X-acto type craft knife with extra blades and a Cutting Mat or old magazine to cut on


Purchase the class for $55 now through Paypal by adding it to your cart or email KarleighJae@gmail.com to register and pay via mail/in-person.

Monday, March 26, 2012

Bookbinding 101: Awls


An awl is used for poking holes in paper and leather (two alternatives are mentioned at the end of this post). There are a few book structures that don't require holes for sewing, but most do, and an awl is one simple tool that does the job well.

What we like is an awl that makes a hole about the size of a needle with thread on it. We also prefer that the diameter, or width, of the awl's "needle" is uniform along the length (except for the pointed tip). This allows us to punch as far in as we wish without being concerned about the hole getting bigger the further we poke through. See photo above.

Some awls (example at right) have a point that keeps getting fatter the further you get away from the point. When using this type of awl for poking holes in pages for sewing, it takes extra care not to punch too far, because the further this style of awl goes into the paper, the bigger the hole will be. With too big of a hole, the binding may be loose in some book structures. Also, a largish hole may or may not not be the look you're going for.

With this style of awl, it may also be difficult to make the holes of a uniform size, as the hole size changes depending on how deep you punch in. One way to solve this is to wrap a piece of masking tape around the awl point, marking a line on the awl point that indicates how far you want to punch in. However, it's often not so much of a concern when poking holes in leather, as the leather is more resilient and may "shrink" back down a bit. The hole is still bigger, but it can close up a bit, and may not visibly look larger.

While an awl isn't very costly, it can be even cheaper if you make your own. At left is one we made with a wooden peg, a drilled hole into the end, and a needle stuck in the hole with a dab of glue to help it hold in. Not as strong as the others, but gets the job done.

Corrugated cardboard is a tool of sorts we use with an awl, placing it under our pages or leather as we punch holes. It allows the awl to poke through deeper than just the point. Alternatively, you can use an open phone book as a "cradle" in which you place pages to punch them. There are also commercial cradles available, or you can make your own out of wood or bookboard.

Some alternatives to an awl include a Crop-A-Dile or a saw. A Crop-A-Dile makes large holes, and will be discussed in an upcoming post. A saw is used for making holes in pages for sewing, and requires a means of clamping the pages together, such as a lying or finishing press. A photo of Jeff Peachey "sawing sewing stations into his text block" may be found here.

Anything to add to the discussion? Please leave a comment.

Friday, March 23, 2012

Bookbinding 101: Bone Folder

A bone folder is your friend. You can probably make books without one, but it's just so darn handy, we wouldn't want to. It performs essential functions that could be done with your hand or some other tool, but it works so well, has so many uses, and costs so little, it's a no-brainer to add it to your tool kit.

It creases pages when you fold them, smooths out leather or paper when adhering them to the cover, creases in leather corners (inside the cover), tools paper or leather when creating embossed designs, burnish edges, make a temporary mark in fabric or leather, or any number of similar uses where you need to flatten, crease, or smooth something out.

A bone folder is traditionally made from bone, but can be made from a variety of materials, including plastic, teflon, and wood. Randy J. Arnold makes beautiful bone folders from wood, including this one made of rosewood, and this one made of ebony. (He also has an etsy shop here.) Note: these are some of the exceptions to the "costs so little" statement made above, but considering that it's handmade with such beautiful craftsmanship, as is the box it comes in, it's a bargain.

We have and love to use folders made with real bone. They don't cost much and have a great feel. Two of our favorites are a 5" taper shaped, and Hollander's 8" (17-20 cm).

Teflon folders are supposed to not mark delicate paper and leather when burnishing, but being a bit pricy, we find the bone to work just fine. Teflon supposedly does not leave marks on paper however, Teflon can mark some papers, so it's a good idea to test before you burnish.

Anything to add to the discussion? Please leave a comment.

Tuesday, March 20, 2012

Bookbinding 101: Tools for Tearing or Cutting Paper

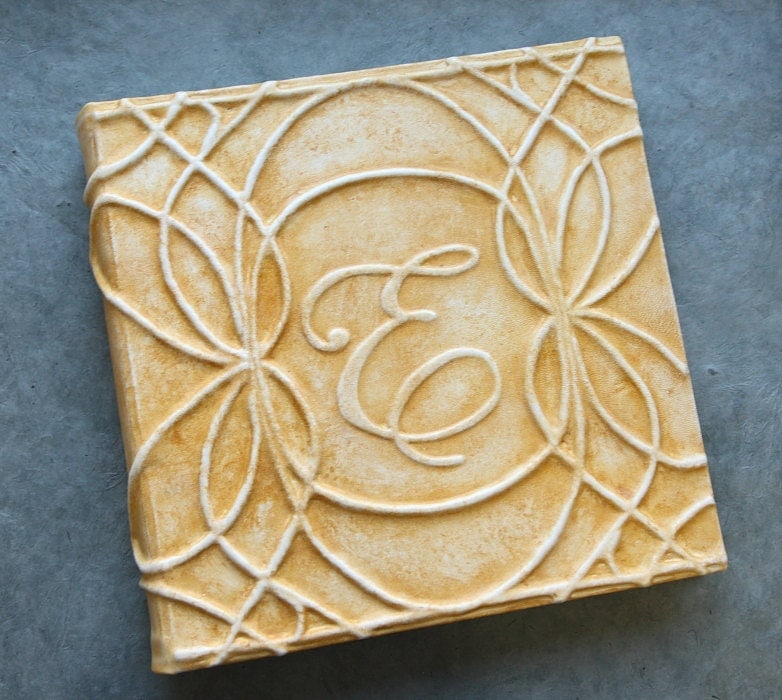
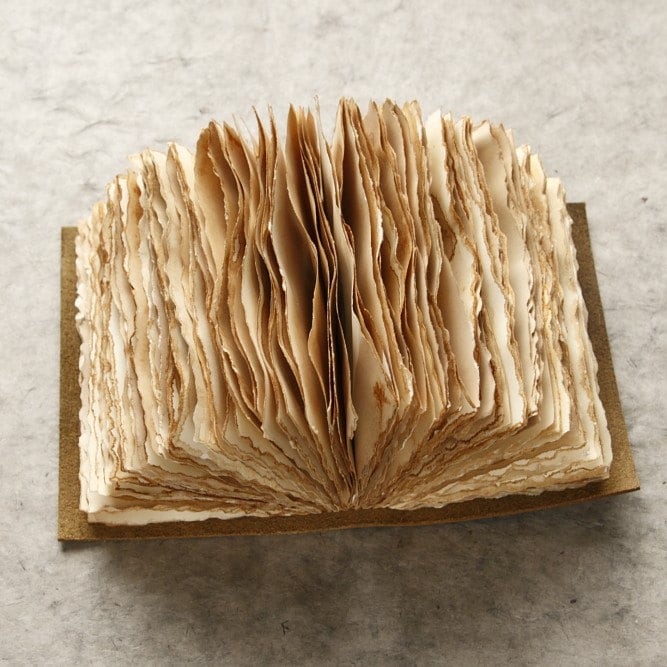
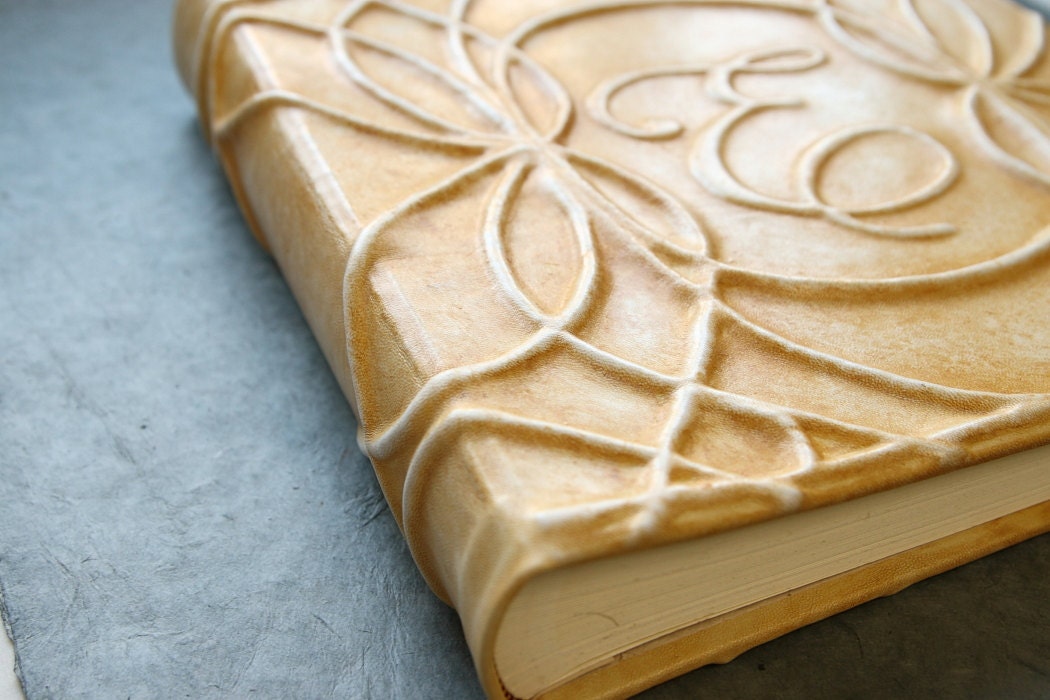
When we first started making books we used a non-serated butter knife to cut paper. Seriously. Fold the paper where you want it torn/cut, and run a non-serrated butter knife inside the fold, slicing with a gentle circular sawing motion, like opening a letter with a letter opener. In fact, you could use a letter opener. This creates a nice soft edge to each page, which looks nice when a block of pages are sewn together, and helps hide the fact that your pages are not all perfectly square and lined up to each other.

Methods of cutting paper that create clean crisp cuts look a bit more uneven when all the pages are put together, because you just can't make them all perfect, and the crisp, hard edges kind of stick out. However, if you prefer, there are ways to get a flat, even surface to the edges of your text blocks after you make them, which we'll discuss briefly below.

Back when a butter knife was our way of cutting paper, Karleigh was looking for sources of paper for making pages, 1000 sheets measuring 25" x 38" (63.5 x 96.52 cm). While talking with a paper salesman on the phone, they were waiting for his pricing information to load on his computer. Here's their actual phone conversation while they were waiting:

Salesman: We usually deliver to large companies. You say you're out of your home?
Karleigh: Yes, I sell handmade books online and I just work from my home.
Salesman: What do you use to cut down all that paper?
Karleigh: I cut it at my kitchen table with a butter knife.
Salesman: (after a pause) I'll have to call you back since I don't have the prices right on hand.

He never called back. It wasn't until later that she realized how silly the butter knife response sounded.

flexible deckled and straight edge tear bar
While a butter knife is a cheap, or free way to get started, at some point you may want to look into getting a steal tear bar.

We have two kinds, both of which we can tear five sheets of 80 lb text weight paper at a time. One is from Logan Graphic Products, has both a deckled edge and a straight edge, and is flexible. Ours is 36", but they come in at least two other sizes, 12" and 18". Some have a "bold" deckle and others a "fine" deckle. Ours is bold. The deckled edge was designed by tracing the actual natural deckled edge of a sheet of watercolor paper, so it is a much more organic design than some of the other brand of deckled edge rulers we've seen.

heavy straight edge tear bar
The other tear bar we have is from Pacific Arc. It is a heavy, barely flexible, flat bar, with one straight edge. It's our workhorse. We find its lower flexibility is nicer to tear against than the more flexible Logan Graphic bar. Ours is 36", but they come in 18", 24", 30", 42", and 48". We'd likely prefer 30", since the papers we tear are at widest 25", and so we lug the extra 6" of weight around unnecessarily. 


We think the deckled edge looks good, but it's also harder to tear. Tearing against the straight edge gives a nice soft look of its own, and that's what we usually use.
torn with straight edge tear bar
torn with deckled edge tear bar

handle bar cork on back
When we bought them, both our tear bars slipped pretty easily unless putting a lot of force against them to hold them down. This made it easy to mess up a tear, and when tearing hundreds of pages it's extra hard on the hold-down-muscles. We modified both our tear bars by adhering a strip of handle bar cork on the bottom, placing it on the edge we don't tear with. For the deckled edge bar, this made the straight edge unusable for tearing, since the cork lifts the straight edge off the surface of the paper. But, that's due to our placing the cork right on the edge. If you place it away from the edge, you could flip the bar over and still tear against the straight edge with the cork side facing up, but of course, you'll miss out on the no slip benefit of the cork tape.
handle bar cork makes
tear bars no slip

You may also use any one of a variety of paper cutters, which, unlike a butter knife or tear bar, leaves a hard edge. Some like the look, some don't, but the edges of the final text block may be made smooth with a commercial paper cutter, a block plane, plough, or even a sander.

Anything to add to the discussion? Please leave a comment.

Monday, March 19, 2012

Bookbinding 101: Blades

The blades we use are a hobby knife (X-ACTO style blade), a rotary cutter, scissors, and occasionally, a scalpel. We have and use both the classic X-ACTO blade, as well as the snap off style blade. We're not particular as to brand, as we also use Stanley, and another unbranded snap off blade, and all have served us well.

hobby knives:
snap off blade and classic X-ACTO style blade
If we had to pick just one blade, it would be a hobby knife, whether the classic one blade style, or the snap off style. Although we would sorely miss our rotary blade, we could get by without it, but we couldn't get by without a hobby knife. The larger handle of the wide blade shown in the photo (red handle) gives a better grip for cutting through bookboard, but each of these blades would do the job.

scalpel
We also have a scalpel, like a surgeon uses, which you might think to be the sharpest and best tool to use, but not necessarily. Sure it's sharp, but it doesn't seem to last any longer. It may even last a shorter length of time than other blades, but we're not really sure (a scalpel is really only expected to be used for a few cuts and then disposed of, so making the blades so they maintain a sharp edge isn't necessarily a concern of the manufacturer). It's rounded shape serves well in cutting into leather, or carving into book board, but the rounded blade does not serve as well when cutting all the way through bookboard. The fatter handle, and straight edge and pointed tip of a hobby knife has worked best for us in cutting through book board.

rotary cutter
A rotary cutter is excellent for cutting cloth, paper, and leather. We went a long time without one, but once we used it, it would be hard to go back. It can be a little easier than a fixed blade to jump up onto the ruler when making a cut, so take care to keep enough downward pressure, and to also keep your ruler-holding-hand away from the edge you're cutting against. A rotary blade is nice to use on bookboard, too, but it dulls it down pretty quickly, so we stick to using less expensive fixed blades for cutting bookboard.

Nothing special to say about scissors. We use them all the time, and while we may be able to get by without them, some cuts are just more convenient with scissors.

When cutting with fixed blades, it's best to slice in one fluid motion with as long a stroke as possible. When using a rotary cutter, rather than rolling back and forth as you move along your cut, roll with a long fluid motion through the length of the cut, only stopping when you need to shift your ruler-holding-hand along the ruler so your ruler doesn't shift on you.

Other kinds of blades can be used, too, including tools for paring leather, or bigger cutting tools such as mat cutters, foot shears, and even a table saw can be used. These are tools for a later post.

Anything to add to the discussion? Please leave a comment.

Saturday, March 17, 2012

Bookbinding 101: Cutting Mats

We have used two kinds of mats. One is an el-cheapo plastic mat that leaves a cut mark with every pass of the blade. It is labeled as a rotary cutting mat, so it may have shown fewer marks if we hadn't used fixed blades on it so much.

Roughed up surface of plastic cutting mat
However, it isn't self healing, and so we expect the surface would have gotten roughed up with whatever kind of blade we used. We used it for all our cutting for a long while, but it got to the point where we couldn't cut paper on it any more as it became too rough a surface and the blade had trouble going straight when cutting paper.

Also, at about 12" x 24" (30.48 x 60.96 cm) it often left us desiring more real estate to work on. It got us by, but for longer cuts we'd have to make a partial cut, then shift the material along the mat to finish the cut. It works, but when making a lot of books, we found that it quickly becomes tedious.

Our other mat (discussed below) is designed for rotary blades and not fixed blades, so we still use the plastic mat to cut bookboard, which we cut with a fixed blade -- that is, when we're not cutting our bookboard with a table saw. (Bookboard is the hard inner "core" of hard cover books, sometimes called chipboard, or davey board. More on this when we get to materials.)

Olfa's self-healing surface stays quite smooth
The second kind of mat we have used is a self-healing Olfa, 24" x 36" (60.96 x 91.44 cm) It has been a nice improvement over our 12" x 24" for the larger surface area to work on, but even so, there are some cuts we make where we wish it were larger. But this serves us well for nearly all the cut lengths we do make.

It's also great for how smooth it has remained after many thousands of cuts on it with a rotary blade. It does not work well with a fixed blade, as the fixed blade leaves a definite mark, and we would likely shred up the surface in short time if using fixed blades on it regularly. But, to ensure it lasts, we don't used fixed blades on it at all.


Alvin makes mats they advertise as self-healing for both rotary and fixed blades, which would be great. They also come in several different sizes, even as large as 4' x 8' (1.22 x 2.44 m).

Anything to add to the discussion? Please leave a comment.

Friday, March 16, 2012

Bookbinding 101: Rulers


Our workhorse rulers are two acrylic quilting rulers, a 6" x 24" June Tailor and an 8.5" x 24" Omnigrid - or for the rest of the world, 15.24 x 60.96 cm, and 21.59 x 60.96 cm. There are other brands that would work equally as well.

We primarily like them because it's faster to measure length and width at the same time, and they also help to keep our cuts square. Additionally, their large surface area gives more friction to aid in their not sliding (but they can still do so), and the measurement lines on them are ever so slightly raised/grippy, which also helps them to not slide on fabric and leather.

The width of these rulers work well for a lot of different sized books, but there are times when we find a 12.5" square or 15" square ruler would be nice to have. Or even larger. But we definitely get by with the 6" and 8.5" widths, as their 24" length serves us just fine in most cases.

We'll often use a 3" x 18" or a 2" x 18" acrylic ruler in tandem with one of the larger rulers. For example, if the 8.5" wide ruler is not as wide as we need, we may lay one of the narrow rulers along it's edge to get more width, or lay the narrower ruler perpendicular to the wider ruler as shown in the photo at right.

Quilting rulers work wonderfully with rotary cutters, but when using a fixed blade knife to cut along their edge, it's possible to accidentally carve out a bit of the acrylic edge, so it helps to take a little extra care to not turn the blade into the ruler when cutting. Our rulers have a few nicks of their own from our less careful use of fixed blades when using them, but we can't recall cutting into them when using a rotary blade. It is possible that either kind of blade can jump the edge onto the surface where your hand is holding the ruler down, so take care to keep your fingers away from the edge, or wear leather gloves, or both.

Steel rulers are great at avoiding nicks by your fixed blades. If they're cork backed they are especially good for not slipping, but they still can slip. Because we have the wider quilting rulers our steel rulers don't see much use due to their being limited to measuring and cutting the width, and then separately measuring to cut the length. Gets the job done, but greater chance of being less than square, and not quite as quick. Another thing to be aware of, as pointed out by Elissa of Blue Roof Designs, is that the cork on cork backed rulers lifts the steel ruler up off of the surface of your material, and your blade can angle underneath the ruler, cutting off more than you intended. It may not be reason to ditch the cork backed ruler, but it is good reason to take extra care to keep your blade vertical when cutting.

Anything to add to the discussion? Please leave a comment.

Thursday, March 15, 2012

Get A Deal, Fund Our Video, Learn to Make Books


To help fund our "Ten Book Workshop" bookbinding DVD, we're offering a discounted price on our live workshops. Interested? Read on.

Starting today we have twenty days to set up a discounted live workshop in your home town, because twenty days from today will bring us to the end date of our kickstarter project. And it's through pledging to fund our kickstarter project that you'll have this chance at a discounted live workshop. (If we don't reach our funding goal, nobody pays, and our video project gets put on hold till a later date - so even if you aren't able to pledge, if you spread the word we'd greatly appreciate it.) Details after the jump.
........
Two of our kickstarter project rewards are live workshops for up to fifteen people. Gather up fourteen of your friends and pitch in to pledge for either a Two Day Workshop or a Four Day Workshop. The first would cost $165 per person (about $35 off or more per person), and the second would cost $300 per person (about $100 to $200 off per person, depending on the workshops chosen) if each workshop is filled to capacity (maximum of 15 people). If you live more than 150 miles from our home, it will cost a bit more, as we'd need to arrange to have our travel expenses covered as well. Contact us and we'll discuss dates and travel expenses. email: karleighjae -at- gmail -dot-com

What your group gets when pledging for a live Two Day or Four Day Workshop:
  • Access to the first video cuts of "Ten Book Workshop" video with the ability to give feedback before the DVDs are published
  • Each person receives a DVD and HD download of the "Ten Book Workshop" when it is completed
  • A thank you on the video credits
  • Choice of live workshops: either Two Day or Four Day. The workshop options are below - mix and match to fill up the days.
  • All materials and some tools for each student attending the live workshops 

Workshop Options:

Creative Boxes
1/2 Day Workshop (3 hours)

Make a clamshell box for foundational box making skills and learn to create a variety of shapes, levels, secrets and trays with this box making workshop! Each student will build and keep their own clamshell box while learning tips and tricks for future box making adventures.

The Cordbound Book
1 day workshop (6 hours)

Create a Traditional Quarter Leather Cordbound Book using modern methods and tools. The cordbound book dates back to the 5th century and were introduced when Byzantium monks established their first scriptorium, Byblos, in modern Lebanon. The Arabs were the ones to bring this style to life with all sorts of decorative work, gorgeous gold embossing and clasp closures. They still make the most wonderful cordbound books in the world. With your choice of leather and papers from around the world, you’ll create and keep your own cordbound book.

Raised & Inset Designs in Paper, Fabric and Leather
1/2 day workshop (3 hours)
Give your books a little character! In this workshop each student has the opportunity to create 3 book covers with Paper, Fabric and Leather. Each book cover will have an inset or raised design of your choosing. Raised and Inset designs on spines of books are also demonstrated and discussed.


Exposed Stitch Books

1 day workshop (6 hours)

Celebrate the diversity of spines by creating 3 books in this 6 hour workshop! Accordion Spine Hardcover Book, Anne Goye's Secret Belgium Binding and the Double Needle Ethiopian Coptic Stitch.  


Antiquing Paper + Leather
1/2 day workshop (4 hours)


Create beautiful old looking books with new materials. Old books are lovely but most often are not sturdy. This workshop will show you how to antique the materials you work with to create an old world look on your newly bound books. Each student will have the opportunity to create small examples of different antiques to use for future reference as well as learn a variety of paper antiquing techniques.


Ten Book Workshop

2 day workshop


Description: Each student has the opportunity to create and keep 10 different books. We will cover the basics of bookbinding for beginners, but students of all skill levels are welcome.
The ten book structures are:
  • Single Sheet Books
  • Chapbooks
  • Japanese Stab Bound Books
  • Flower Fold Books
  • Accordion with Pockets and Sewn Signatures
  • Hinged Ledger Book
  • Circle Accordion
  • Softcover Leather Longstitch
  • Hardcover Longstitch
  • Tapes Bound Book ( A Traditional Hardcover Book)


Interested? email: karleighjae -at- gmail -dot- com


Bookbinding 101: Basic Tools

We'll be covering a wide range of skills and book structures, for which there is a basic set of tools we recommend. In later posts we'll discuss each tool in detail,  we'll discuss alternatives, and briefly mention fancier tools (which we'll discuss in greater detail in Bookbinding 102), but the following list of tools will enable you to create a wide range of structures.

In fact, you can create (nearly) any book structure there is with just this simple set of tools.

Fancy stuff like sewing frames and presses can be nice to use, but are not required. We make a large part of our living making books, and only sometimes use a sewing frame (for convenience rather than necessity), and never use presses, opting for clamps or weights instead when the need for one arises. 

The following list combines in a single bullet point similar tools or tools that go together.

Again, we'll be discussing these in detail in upcoming posts:


Anything to add to the discussion? Please leave a comment.