Thursday, November 29, 2012

30 by 30

I turned 29 yesterday. I remember my parents turning thirty. Thirty in my mind has always meant: Adult. 

Gulp. 

I have one year left before I'm officially an adult. So what am I going to do in that year? Here's my Thirty Things to Do before I Turn Thirty:

(they are in no particular order of importance, just a random list of things I'd like to do)


  1. Give five handmade gifts away (not for any special occasion, but just because)
  2. Take another out-of-state trip with Daniel
  3. Start a photo album of our family -- (we make albums and Daniel is a photographer. You'd think we'd have one started already, right?)
  4. Teach an Online Class -- (Will you be attending?)
  5. Hiking trip overnighter with Daniel and the boys. 
  6. Finish a landscape painting. 
  7. Create a self-portrait.
  8. Girl's day out with Mom, and Sisters. This has to be the whole works: shopping, lunch, pedicures, movie. Seriously. So. Excited. For this.
  9. Strengthen my voice. I lost it last May teaching a week of workshops in Los Angeles. It's never been the same.
  10. Read the Standard Works again. (This includes the Holy Bible, Book of Mormon, Doctrine and Covenants, and Pearl of Great Price.)
  11. Printmaking with the boys. Jadon has been persistent about asking to do this. I love that.
  12. Buy a Car. We have never owned a vehicle. I think it's time.
  13. Teach a free class open to the whole community. 
  14. Watch a foreign film with Daniel. (we use to do this often, I'd like to start doing this again.) 
  15. Take the boys bowling.
  16. Create a new set of one-of-a-kind monotype prints (12-15)
  17. Organize and decorate every room in our apartment.
  18. Replace the eye glasses I lost a few years ago. I'll be needing them to drive at night.
  19. Visit the zoo with my boys.
  20. Learn to play 5 hymns on the piano.
  21. Enter 3 juried art shows within the year
  22. Attend the temple monthly for one year 
  23. Finish a quilt (one of the many already started)
  24. Finish my kids Halloween costumes at least 2 weeks before Halloween
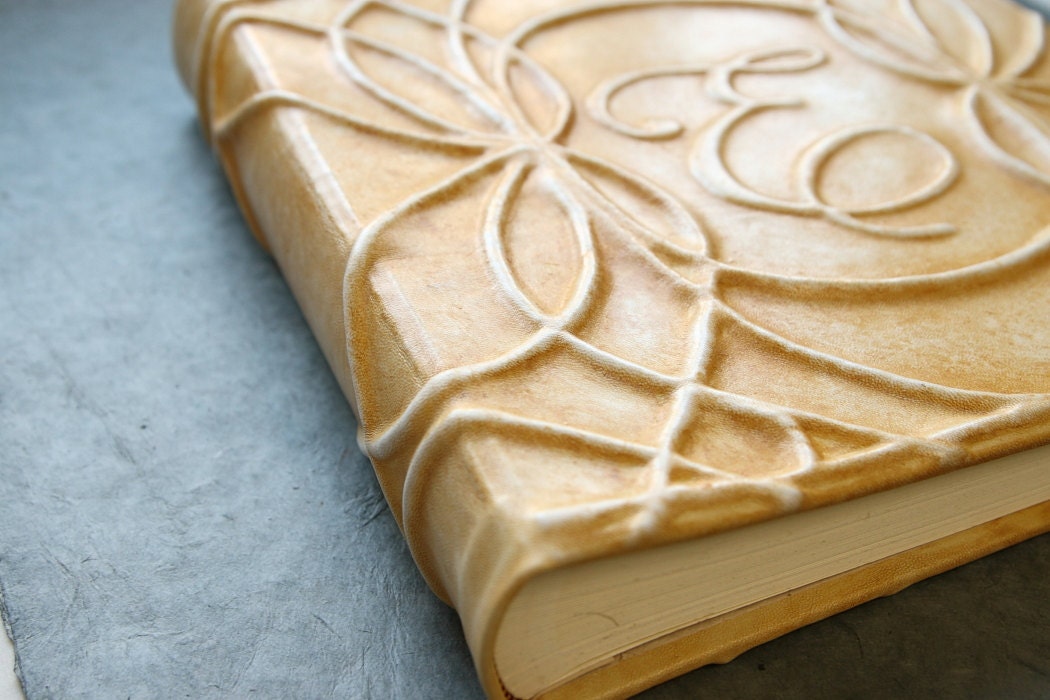
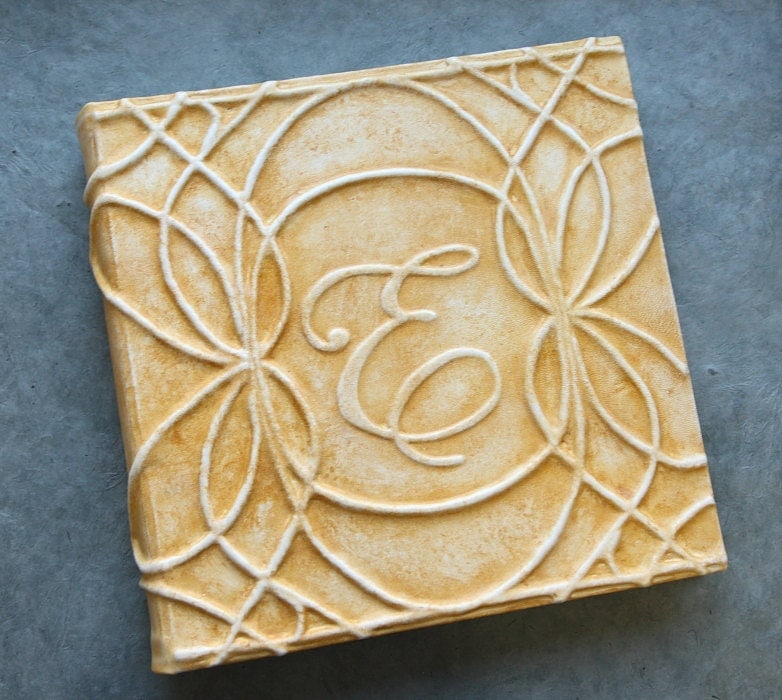
  25. Finish my 100 artist books in one year project (finished date is set for Oct 1, 2013)
  26. Reach blog post #300. This post is #185. Please leave comments. They motivate me.
  27. New family photos taken
  28. Take another class or workshop in relation to bookbinding. I'm always learning. It's a must.
  29. Learn to meditate. 
  30. Write 10 letters to my children to give to them at some far future date. 

I can do this. I can be an adult.

Saturday, November 10, 2012

Secret Belgian Binding Workshop

The 10 book workshop in Logan was going to be the last bookbinding class I taught this year, but upon request, I'll be teaching a couple more before this year is through.

The Secret Belgian Binding Workshop
November 30th, 2012
5:30 pm - 9pm
201 West Center Street, Provo, UT
The studio above Provo Art & Frame


There are five Secret Belgian Binding Books in this photo
(the rest are coptic). These Coptic Stitch and Secret Belgian Binding
Books are from the workshop in Los Angeles back in
May of this year (2012). I love the combinations
of decorative papers that my students used.  

The Secret Belgian Binding has a look similar to a Japanese Stab Bound
but it's a hardbound book that will open really nice with pages
that lay flat.

This binding works well for any purpose: journaling, sketchbooks,
guestbooks, photo albums... it really is a very versatile book and we
discuss the different materials you can use for this book in the
Secret Belgian Binding workshop.

The workshop is November 30th which is a Friday Night. Is Friday night your date night? Bring your husband or wife and they get a $10 discount.

Students need to bring the following tools but all other materials/tools are provided. We bring our stash of papers from around the world for you to choose from . . . you'll love it!

Tool list (all my students get a discount at Provo Art & Frame, just ask for a discount card at the checkout):

Pencil
Scissors
Bonefolder 
Bookbinding Awl 
Xacto Type Craft Knife
Cutting Mat
Metal Edged Ruler
Glue Brush (we recommend a 1" flat brush)


Wednesday, November 7, 2012

Last chance to sign up!


Today is the last day to register for the ten book workshop in Logan, UT.


Teaching the ten book workshop

At work making beautiful books. This photo is from the
Bountiful Davis Art Center which is one of my favorite
places to teach. I loved this class and students went
away with amazing books.

Tuesday, November 6, 2012

Bookbinding Now: Have you been listening to these podcasts?

I have. And I think they are absolutely wonderful. We live in the middle of the rural Western United States and I must say, there are not many bookbinders in our area. For me to be able to connect to other bookbinders through the internet is such a blessing!

My newest love has been Bookbinding Now which is a series of interviews with people who are involved in anything book art related. I find myself connecting with certain book artists and saying out loud, "Me too!" or "That's exactly how I view my own approach to books."


Visit Bookbinding Now to listen to past interviews and upcoming ones. They come out every other Wednesday. I look forward to each of them!

A big thanks to Susan Mills for her wonderful contribution to the book arts world with Bookbinding Now. You can also make a donation to Susan for these amazing podcasts which will help to keep them coming!


Monday, November 5, 2012

Bookbinding 101: Headbands or Endbands

If you don't already know about headbands on books, you just might always notice them on books from here on out.

Headbands are found at the very top of the spine of a book. If the book has a covered spine, then the headbands can be found between the text block and the material covering the spine.

Let's talk terminology for just a second. The book has a head and a tail at either end of the spine. Headband refers to only the one side. I'm not sure when the change occurred but some people nowadays call them endbands. I prefer the term "endbands" because we aren't leaving out the tail end. It's more fair that way.

Do you see the endband on this book?

Originally, endbands were created not primarily for decoration but as part of the sewing structure to strengthen the binding of the book, and the endband's good looks were a bonus. So, traditional endbands are actually sewn onto the ends of the text block before the cover is put on, binding the ends of the pages together along the spine. Today though, you can purchase or make your own faux endbands to add to your books. The faux endbands do give added support to the structure, because it is glued in place, acting as a tape to help hold things together, but support might just be secondary to their decorative purpose. Even if people don't consciously notice them, it gives a subtle, finished look.

Faux endbands can be purchased by the foot or yard and
can be cut to the width of the book spine and glued on
using the linen or cotton tape that the endband
is sewn onto.

There are different materials, styles and sizes of endbands. If you are making a small book, like on the "booklace" shown below, then you'll need size 0.
For this 1.5" tall book,
I used a size 0 end band

For a larger book use size 2 or 3.

For this 8" x 10" book,
Daniel used a size 3 end band.

We buy our endbands from Talasonline.com because we buy them in bulk and it's less expensive that way, but you can also buy them from Hollanders.com.

For those of you who would like to learn to sew your own end bands. Here are some great tutorials from fellow bookbinders:


Tuesday, October 2, 2012

Bookbinding Workshop in Logan, UT


Ten Book Workshop

October 26th and 27th, 2012

Postponed to November 9th and 10th, 2012!
8am - 4pm

Logan, UT
---Tippetts Balcony in the Fine Arts building on the USU Campus---

NOTE: This workshop is not just for students. Anyone in the community is welcome to come!


All students are required to bring a basic tool kit. We will have bonefolders and awls that you can purchase for a low price available at the workshop.

  • Pencil
  • Scissors
  • Bonefolder
  • Bookbinding Awl
  • Xacto Type Craft Knife
  • Cutting Mat
  • Metal Edged Ruler
  • Glue Brush (we recommend a 1" flat brush)


All other materials for the projects made will be provided by us for this 2 day workshop.


Each student has the opportunity to create and keep 10 different books. Historic and contemporary styles of books, bookbinding tools and techniques are discussed.


We will cover the basics of bookbinding for beginners, but students of all skill levels are welcome.


The ten book structures are:


  • Single Sheet Book 
  • Chapbook 
  • Japanese Stab Bound Book 
  • Flower Fold Book 
  • Accordion Book with Pockets and Sewn Signatures 
  • Hinged Ledger Book 
  • Circle Accordion Book
  • Softcover Leather Longstitch Book
  • Hardcover Longstitch Book
  • Tapes Bound Book (A Traditional Hardcover Book) 


Registration Closed for this Class

Ethiopian Double Needle Coptic Stitch Class


October 19th, 2012
5pm - 8pm

Provo Art & Frame


201 W Center Street in Provo, UT


The Ethiopian coptic stitch dates back to the 4th century. It's a beautiful book with an exposed spine in which you can see the sewing of the pages. The coptic stitch book will open flat for maximum use of the pages. It works great for sketchbooks, photo albums and journals. It's also a nice book for recipes because you don't have to hold it open while cooking in the kitchen and it works great as a wedding guestbook too.


All levels of expertise welcome including beginners! Ages 10+ for this class.

Class fee is $50 which includes all the materials you'll need for the book you make and keep!

Students need to bring the following tools:


  • Pencil
  • Cutting mat (or old magazine to cut on)
  • x-acto type craft knife or utility knife
  • Scissors
  • Metal Edge Ruler
  • Bonefolder (available at Provo Art & Frame, ask or a student discount for taking my class!)

To register and pay for the class, click on the "Pay Now" button below which will allow you to pay via credit card or by using your bank account in the form of an E-Check. If you have any questions please contact Karleigh at KarleighJae@gmail.com

CHECK OUT IS CLOSED FOR THIS CLASS. 

Monday, August 27, 2012

Snow College Classes Coming Up

Book Binding Class:


Each student will create 10 different books throughout the course. Each book will be unique in style/design/materials. You will learn about bookbinding tools and techniques, and about historic and contemporary styles of books. 


Days: Thursdays (6 weeks)

Dates: Sept 20, 2012 through Nov 1, 2012 (no class the week of Fall/UEA break)

Time: 6:00 - 9:00 p.m.
Location: Humanities Building North East Corner Classroom 
Fee: $85 (includes the materials for your books)


You are required to bring a metal-edge 12” rule, an Exacto-type craft knife with extra blades, a pencil and scissors. 


The Basics of Selling On Etsy Class:

Would you like to learn how to sell your handmade art and crafts via the Internet from Home? Etsy has over 12 million members and experiences more than a billion visitors a month. This course will teach you how to set up and run a small business from home selling your handmade items. We cover shop policies, shipping your products, taxes, photographing your items and advertising. Whether you make furniture, baby blankets, jewelry, oil paintings, clothing or just anything handmade, Etsy is a great way to get your small business started. View www.etsy.com to see if you want to learn how to make this web resource work for you.

Days: Tuesdays (6 weeks)
Dates: Sept 18 through Oct 23
Time: 6:00–8:00 p.m.
Location: Lucy Phillips Bldg. Room 204
Fee: $65
For information on how to register for the bookbinding or etsy class please read here under the heading "Non-Credit Community Courses."

Friday, June 15, 2012

Bookbinding 101: Linen Tape

When a book structure calls for tape, linen tape was traditionally used, and today it is still used by most bookbinders and conservationists instead of cotton tape.


It's not sticky backed tape like duct or masking, rather, it is basically a narrowish woven fabric, which you sew, and maybe also glue, to the pages when constructing some styles of books. The ends of the tapes are then glued, and/or sewn, onto the covers. The last photo below shows one way tape is used in bookbinding (however ribbon was used rather than linen tape - the stitch is the Romanesque stitch).

Linen tape comes in different sizes. Just pick the width that fits your design and/or budget.

Cotton tape is not as strong but it is cheaper, so if you're making a book that doesn't need to last for a long, long time, then it can be a good alternative that costs less.

Cotton tape

A trick I learned from Lizzy House: use book cloth as the tapes. I've had a lot of fun experimenting with this.

Bookcloth can be a tape substitute

Here are three good reasons to try substituting linen book cloth for linen tapes:

Reason 1: you can cut the book cloth into strips as wide as you need to, which especially helps when creating larger books. 

Reason 2: The linen bookcloth, if backed with paper, adds extra strength to the binding, and adds a little thickness (which can help for reason 3).

Reason 3: You can make fun designs with the tapes on the inside or outside of the cover by cutting the ends into shapes. In a previous post we have a few examples of book-cloth-as-tapes showing through the the paste down (the paste down being the cover side of the endpaper). The pages are sewn onto those tapes just the same way as can be seen here. You may optionally place the decorative ends of the tapes on the face of your cover, and depending on the book structure it may either show as a raised design through the cover material, or you may leave it visible. The last photo below shows visible tape on a completed book (albeit with ribbon instead of book cloth).

Reason 3a: With book cloth, your color choices are much greater than when using "real" tape, giving you more options in your design.

Book cloth backed with paper

You may of course use traditional linen or cotton tape in similarly decorative ways, but book cloth gives more options in width, shape, and color.

You can also use ribbon instead of tape or book cloth, but durability may not approach that of linen.

Ribbon used as tape - works, but may or may not be as durable
- Romanesque stitch -

Anything to add to the discussion? Please leave a comment.

Friday, June 1, 2012

Cordbound Class at the Central Utah Art Center

Cordbound Bookbinding Class 

Central Utah Art Center 
86 North Main Street - Ephraim, UT 

June 16, 2012 
10 am - 4pm 

Class is for beginners but all levels welcome!


 The workshop goes from 10am to 4 pm with an hour break for lunch. You're welcome to bring a sack lunch. The cost is $55 per person which includes the materials and some tools you'll need for the class. Bring a friend and get a discount! $30 off when you and a friend sign up together.

To register and pay for the class, sign up here (Note that there are two options in the drop down menu):


In the class you'll create a traditional quarter leather cordbound book using modern methods and tools. The cordbound book dates back to the 5th century and it was introduced when Byzantium monks established their first scriptorium, Byblos, in modern Lebanon. The Arabs were the ones to bring this style to life with all sorts of decorative work, gorgeous gold embossing and clasp closures. They still make the most wonderful cordbound books in the world. With your choice of leather and papers from around the world, you’ll create and keep your own raised cord bound book.


Students need to bring both a sack lunch and the basic tool kit. Everything else is provided!

Basic tool kit to bring: Scissors, Pencil, Metal edged Ruler, Bonefolder, 1" flat brush for glue, Bookbinding Awl, X-acto type craft knife with extra blades and a Cutting Mat or old magazine to cut on

If you can't locate any of these tools, please contact me as we do have bone folders and awls we can sell to you. Everything else should be attainable at Walmart or your local hardware store.


Purchase the class for $55 now through Paypal by adding it to your cart via the Buy Now button above or email KarleighJae@gmail.com to register and pay via mail/in-person. If you've taken the class before and just want a refresh or the good time of making a cord bound book with a fun group, please contact us for a discounted price and to reserve your spot.

Thursday, May 31, 2012

Bookbinding 101: linen thread

A common question from beginning bookbinders is if silk embroidery thread or regular cotton sewing machine thread can be used to make books. I tell them "Yes, but don't expect the book to last very long." Linen thread is simply stronger, and will hold up better over time.


Traditionally, linen thread has been used in bookmaking because of it's strength and long life. It's also not as stretchy as other fibers which makes for a tighter binding. It does, however, stretch over time, so a tightly sewn coptic book, for example, will loosen up a bit with use.

We use Crawford waxed Irish linen thread for most of our books. We typically use 3 or 4 ply -- also referred to as 3 or 4 cord, rather than ply -- and would not recommend using anything thinner than that, except on miniature books. You can also use 6 ply, 7 ply or 12 ply. I like using the 6 ply or 7 ply for exposed sewing as it shows off the stitching much more than the 3 or 4 ply.

We use the 3 or 4 ply for book structures in which the sewing is hidden, as they allow the pages to be bound more closely together than if using, for example, 6 ply.

Our thread comes from Royalwoodltd.com which also ships internationally. If you want to purchase a smaller amount (say, 5-10 yards) of one color instead of an entire roll then you may oh so conveniently purchase smaller amounts from us through our shop at badgerandchirp.etsy.com. Alternately, Bookfindings also sells smaller amounts of linen thread.

Non-waxed vs Waxed Linen Thread

You may buy both waxed and unwaxed thread. If you buy unwaxed, you'll likely want to acquire a piece of beeswax with which to wax it with. The wax reduces friction to allow the thread to glide through much more easily as you sew and keeps the fibers from fraying. We prefer the convenience of waxed thread, but many others like the unwaxed, being able to control the amount of wax they apply as they run their thread over their piece of beeswax. And some binders simply like the process and tradition of waxing their own.

If you would like to wax your own thread, you can find a nice little tutorial to do so from SeaLemon.


Wednesday, May 30, 2012

L.A. Workshop - Recap

Our recent Book Art Workshops in L.A. was so much fun.


We taught Box Making, Cordbound Books, Raised and Inset Designs in Paper, Fabric and Leather, Exposed Spine Bindings such as the Ethiopian Double Needle Coptic Stitch, Secret Belgian Binding and an Accordion Spine Book, and our 10 Book Workshop.

Kelly Kilmer came with her amazing Expressions Journaling Class and Karleigh is now an enlightened journaler (more on this to come!)

We also had so much fun with Jeannine Stein's classes in which she taught us to make booklaces and create beautiful books using cabinet cards and the romanesque stitch.

Karleigh lost her voice which was down to just a whisper by Thursday morning so Daniel filled in for the last three days of classes. While we had several students come to individual classes, we had three amazing women come to the entire week. Congrats to Amy Spencer, Regina Franchi, and Jessica Meyers for surviving and entire week of intense book arts! They created gorgeous books and it was so fun for us to see everything that was designed and made during these classes. We also had great treats thanks to Regina, Amy and Jeannine! And we had a bit of fun eating out at a few places while we were there. The Pie Hole was amazing and highly recommended (Get the Chicken Pot Pie, skip the Salad).

Some of my favorite quotes from the week:

Jeannine Stein: "That's why we make books, so we can eat cupcakes." She brought some scrumptious cupcakes from Crumbs.

Kelly Kilmer: "Messy tables just mean we are having fun!"

Kelly Kilmer: "You can't mess it up. Just keep going.

Amy Spencer: "I need to find something fancy to wear with this booklace." I love that an outfit was designed around a miniature book. She found something a bit dressy to wear with it during the week.

Jeannine Stein: "There are no mistakes, only design elements."

Daniel: "Karleigh, come drink this Cayenne." (Yes. I did. And No. It didn't help my voice come back.)

Amy and Jessica deciding on which dessert to get at the Pie Hole: "Let's just get all of them."

We tried the Blueberry Cheesecake Pie, Mexican Hot Chocolate Pie, Maple, Lemon Merengue and (a brownie-ish chocolate one that was extremely rich tasting). We all had different favorites. Thanks to Amy and Jessica for treating us!

Monday, May 28, 2012

Name Change

We've been blogging slackers the last few weeks, but we plan on changing this in the next few days with more Bookbinding 101 posts. For now, some biggish news. For us any way. While our shop and blog have been called Karleigh Jae after the instigator of all this bookbinding madness adventuring these last few years -- selling books online since 2008 -- we're making a name change. We're now Badger and Chirp, with the following being our working logo (bound to change, of course).


It really has been a team effort between both Karleigh and Daniel since the very beginning. In the beginning it was mostly Karleigh making the books, with Daniel doing some of the binding, while putting more time in on the business and marketing side of things. But it was Karleigh's show, and Dan's role grew until now (for some time now, really) we both do a good share of the bookbinding. All along we've both wanted to reflect the fact that we both run the shop, and write the blog, and finally (finally!) we've settled on a name. With etsy's recent-ish-ly allowing shop owners to change their shop names, this allows us to more easily implement the change we've wanted to make for a while now.

We will be changing the blog name to match, and expect to have the new name and look in place within the week.

Wednesday, May 2, 2012

L.A. Workshops: Three days to Sign Up!

Just three more days to sign up for our Book Art Workshops in Los Angeles

Discount Offer:
Sign up for the entire week of classes with one or more friends for $585 each.

(All classes purchased individually would total $850.)

Offer ends May 5, which is the final day to sign up for classes.

You may learn more or sign up here.

Friday, April 27, 2012

Workshop Options

Workshop Options 

These workshops can be taught throughout the world, contact us with your location for pricing information.

If more than 8 people sign up for a class, Daniel assists in teaching with Karleigh so that everyone is given the needed attention while they make their books/projects.

15 people maximum per class

All students are required to bring a basic tool kit:

Pencil
Scissors
Bonefolder
Bookbinding Awl
Xacto Type Craft Knife
Cutting Mat
Metal Edged Ruler
Glue Brush (we recommend a 1" flat brush)

All other materials for the projects made will be provided by us for the class.


.....................................

 Ten Book Workshop
2 day workshop taught in 8 hours each day


Description: Each student has the opportunity to create and keep 10 different books. Historic and contemporary styles of books, bookbinding tools and techniques are discussed.

 We will cover the basics of bookbinding for beginners, but students of all skill levels are welcome.

The ten book structures are:
  • Single Sheet Book 
  • Chapbook 
  • Japanese Stab Bound Book 
  • Flower Fold Book 
  • Accordion Book with Pockets and Sewn Signatures 
  • Hinged Ledger Book 
  • Circle Accordion Book
  • Softcover Leather Longstitch Book
  • Hardcover Longstitch Book
  • Tapes Bound Book (A Traditional Hardcover Book) 


.....................................

The Cordbound Book
1 day workshop (8 hours)


Create a Traditional Quarter Leather Cordbound Book using modern methods and tools. The cordbound book dates back to the 5th century and was introduced when Byzantium monks established their first scriptorium, Byblos, in modern Lebanon. The Arabs were the ones to bring this style to life with all sorts of decorative work, gorgeous gold embossing and clasp closures. They still make the most wonderful cordbound books in the world. With your choice of leather and papers from around the world, you’ll create and keep your own cordbound book.

...............................................................
Raised & Inset Designs:
 Paper, Fabric and Leather
3 hour workshop


Give your books a little character! In this workshop each student has the opportunity to create 3 book covers with Paper, Fabric and Leather. Each book cover will have an inset or raised design of your choosing. Raised and Inset designs on spines of books are also demonstrated and discussed.

.........................................................
Exposed Stitch Books
2 day workshop (8 hours each day)

Celebrate the diversity of spines by creating 3 books in this 2 day workshop. Accordion Spine Hardcover Book, Ann Goye's Secret Belgium Binding and the Double Needle Ethiopian Coptic Stitch. We also cover button/thread closures, strap closures and other closures in this class.

......................................................................
Antiquing Paper + Leather
can be taught in 3-5 hours (more samples are examined with longer class time)


Create beautiful old looking books with new materials. Old books are lovely but most often are not sturdy. This workshop will show you how to antique the materials you work with to create an old world look on your newly bound books. Each student will have the opportunity to create small examples of different antiques to use for future reference as well as learn a variety of paper antiquing techniques.
 ..................................................................
Creative Boxes
2 day Workshop (7 hours each day)


Make a clamshell box for foundational box making skills and learn to create a variety of shapes, levels, secrets and trays with this box making workshop! Each student will build and keep their own clamshell box while learning tips and tricks for future box making adventures

.................................................................


Wednesday, April 25, 2012

Bookbinding 101: Binder's Board

Binder's board is what puts the hard in a hard bound book. Also called book board, Davey board, grey board and chip board (although chip board probably isn't what you actually want, but it is sometimes used as a synonym for binder's board).

Some types of binder's board are smoother than others. Davey board is a higher standard of board and has a smoother finish many other brands of binder's board.

Grain

Like paper, binder's board has a grain. If you buy large pieces, it's helpful to mark the grain direction across the whole piece in several places so that when you cut it down and have leftover scraps, you'll know the grain direction of those smaller pieces.

We have made some very large books that required extra thickness for the cover so we glued two pieces of book board together and pressed it overnight. Too large for any press, we placed a wooden board on top with heavy stuff, whatever we could find, on top of the wooden board. When gluing the two book board pieces together, we made sure to cross the grains, so that one board's grain went one way and the other board's grain ran the other. This helped the cover board to not warp after gluing them together.

Thickness

For box making, smaller books, and some rounded spines, we like to use a thinner book board that's .059" thickness (or about 1.5mm or 1/17"). For most of our other books, we like using thicker book board as it give our books a bit more heft. Also, with larger books, the thicker board lends more support and sturdiness to the book. The thicker board is .098" thickness (about 2.5mm or 1/10" thick). For books in the range of about 4"x5" (10.16 x 12.7 cm) to about 8"x10" (20.32 x 25.4 cm) we like .080" thickness of book board (about 2mm or 1/12").

Colors

Binder's board also comes in black and white. These are especially useful when using a thinner paper for your book's cover or end sheets if you do not want the typical grey binder's board to show through, but instead prefer either a black or white background behind the thin paper.

Black or white board can also be handy when making board books, the kind of books for toddlers with the heavy duty, no tear pages, which typically have white book board as the core of each page. Usually, board books have rounded corners, perhaps to make them safer for kids, but also because the rounded corner is more durable -- if the book had a ninety degree corner, a toddler would smoosh it out of shape in no time -- the rounded corner takes the wear and tear better. When making your own books, if you happen to drop a cover piece you are working on and it squishes just a bit, don't despair. Try using your bone folder to shape it back into place. If that doesn't work, consider turning the book's corners into rounded corners.

Anything to add to the discussion? Please leave a comment.

Saturday, April 21, 2012

Bookbinding 101: Paper for Pages

We prefer papers that can take handling during the process of bookbinding without too easily denting or otherwise showing signs of handling. It can't be completely avoided (it's paper, after all) but an 80 lb. text weight (118 gsm) is about right for us. It is more opaque than lighter weights, too, which is better for writing and drawing on both sides. We do use heavier papers, but 80 lb.  is our go-to journal and sketchbook paper. Specifically, we use Mohawk Solutions 80 lb. (118 gsm), Smooth, Soft White, 25"x38" (63.5cm x 96.52cm). It also comes in other dimensions, and weights, and finishes/textures (such as super smooth and vellum). Really, though, find a paper you like, or something cheap if you're just learning and don't really care about the characteristics of the paper. Eventually, you may want to move into something nicer, but maybe not, as you may find a package of printer paper suits you just fine. Mohawk papers are nice, but there are many different brands out there, and rather than getting hung up on it, we'd suggest to just get something and go to work.

If you do want something really nice for general purpose writing and drawing, the Mohawk Solutions is good, which is why we use it, but even nicer is Mohawk Superfine. You may not notice much difference between the two unless you are a paper snob, but, when comparing the same weight and finish/texture, we find there is a more luxurious feel about the Superfine compared to the Solutions. It also costs about twice as much. Not a deal breaker for making a few books, but for us, when making a lot of them, we find Solutions to be plenty good.

Art Papers

We also make books with heavier weight art papers, such as Rives BFK, Rising Stonehenge, and Nideggen. We use them either for artists who have specific paper preferences, or whenever a heavier and/or richer feeling paper is desired. Of course, these are not the only papers to consider, it's just what we have used, and we have liked using them.

The BFK is just plain nice to touch, with a more supple flex to it than the Stonehenge. For times when a stiffer page may be preferred, such as when you may want to adhere anything to it, such as photos, we recommend Stonehenge over BFK. Nideggen is a unique artist paper, has a sandy color, and because Nideggen is a laid paper it has a wavy surface texture.

Grain

Paper usually has a grain, usually running lengthwise. If you fold against the grain, it won't crease as nicely -- in fact, you may have to fight it to crease somewhat straight -- and it will be more likely to crack. You may or may not see any cracking in the paper when you first fold it, but over time as the book is used, it will be more likely to crack and tear out of the book. It also affects how well the book opens. Mind the grain.

It's easy to figure out the grain direction by folding over the paper without creasing. Do this in both directions, and the direction with the most feeling of resistance is folding across the grain, and the direction that folds easiest is folding with the grain. Here are some other methods of determining grain direction. Here is an explanation for why paper has grain.

Permanence

Another consideration in choosing a paper is whether or not it is acid free, but most paper available is. Acid free means PH neutral or alkaline, and so there is no acidity in the paper that will yellow and otherwise degrade it over time. But for even greater longevity you may choose a paper that is a bit on the alkaline side, so that as the natural acidity of the environment interacts with the paper, it has a reserve of alkalinity that prolongs the paper life before yellowing and otherwise degrading and falling apart.

Also, consider what you put on the page, as some inks won't be acid free or archival. This isn't just an "Oh, by the way," but is really an important consideration for any writing or drawing you hope will be around for your great-great-great grandchildren.

Anything to add to the discussion? Please leave a comment.

Friday, April 20, 2012

Bookbinding 101: Materials

You can make books out of anything. Reclaimed wood, aluminum cans, banana leaves, cereal boxes, butterfly wings, rusty hinges, fishing flies -- really, whatever you want to use can be used in the process of making a book. But in this 101 series of posts we're not going to get into the more creative materials you might use, but set a foundation of understanding for constructing basic book structures using more traditional materials, and from there you may branch out into a birdcage and canary grass book (or whatever) if you wish to.


All the materials in the following list can be replaced with something else, and some structures we don't cover in 101 will require additional materials, but for the present course, this is what we will discuss:


We'll discuss the materials in greater detail in upcoming posts.

Anything to add to the discussion? Please leave a comment.

Thursday, April 12, 2012

Bookbinding 101: Glueing and Clamping Tools

For applying glue, just about any kind of brush will get the job done, choosing a size depending on the surface area you are applying glue to. However, we find that foam brushes work better to pick up extra glue than they do for applying it. For getting started, nothing beats buying a bag of cheap artist brushes of varying sizes. Some book binders do prefer a traditional round glue brush, and we've also heard of someone who likes using a shaving brush. For the flat surface of a book cover, you can also use a scrap piece of book board to lay down and/or smooth out the glue, using it like a squeegee or putty knife.

In time you'll develop your own preferences, but to begin, just grab a cheap brush, or a piece of book board, and you are all set for laying down your glue.

Wax paper is a great shield to keep glue from dripping and sticking to the pages of your book. Tear a sheet off, and place it inside the front cover before you begin glueing, making sure it is large enough to hang over and protect your pages. When applying any glue inside the cover, the wax paper prevents the glue from sticking to your first page, and peels off fairly easily after the glue has set. Waxed paper also acts as a moisture barrier, preventing your pages from warping while glued down end papers are drying.

Clamps can act as a third hand to hold a book up while you work on it, or they can be a cheaper and more portable alternative to a press for smaller books. Spring clamps are fairly inexpensive and we use them frequently.

Spring Clamps
Wooden Handscrew
Clamp
We also occasionally use a wooden handscrew clamp or two. A bit clumsy, and a bit heavy, but being something we have on hand it works pretty well. 

Anything to add to the discussion? Please leave a comment.


Wednesday, April 11, 2012

L.A. Workshop Discount

Los Angeles, CA
May 7 - 12, 2012
Just a few more days left!
Purchase the entire week of L.A. Book Art Workshops (6 days, 8 workshops) for only $550! Regular price is $850.

Workshop details

To purchase, please click the button immediately below - offer ends April 14th:

Thursday, April 5, 2012

Bookbinding 101: Hole Punching Tools


For making largish holes in leather and book board you can use a hollow punch (shown at left), which has a sharpened tube shaped hole on one end, and a flat head on the other end. Ours has replaceable tips for different size holes, but some hollow punches come in sets with a different punch for a different size hole.

To make a hole, place something underneath your material, something soft but dense, such as a scrap of book board, or an old phone book or catalog. Make sure it's thick enough to allow the punch to go into without going all the way through. You may also wish to avoid punching holes anywhere that if it does go all the way through it won't leave a hole where you don't want one (kitchen table, etc).

Next, place the hollow end of the punch on your material where you want a hole, hold the punch vertical, and hit the flat head with a hammer. Hit it hard. Repeat as needed. It can be a chore, but, as it requires wielding a hammer, it can also be satisfying.


Crop-A-Dile I
Nowadays we use a Crop-A-Dile, which speeds things up considerably, doesn't wake the neighbors, and makes the chore of punching a lot of holes less of a chore. However, just like getting a dishwasher after washing by hand, it doesn't take long before the ease of doing dishes, or punching holes, becomes a chore again. Cure: use the hollow punch and hammer to punch a lot of holes, then the Crop-A-Dile becomes a dream to use again.

The Crop-A-Dile comes in three flavors, designated by a I, II, or III, only two of which are for hole punching. (The Crop-A-Dile III, or Main Squeeze, is not for hole punching, but for die cutting, embossing, attaching corners and setting squeeze tabs. What's a squeeze tab?)

Crop-A-Dile II
The Crop-A-Dile I (original) and II (or Big Bite) both punch holes of two sizes, 1/8", and  3/16". They also set snaps and eyelets, which is handy. The main advantage of the Big Bite is it has a 6" reach, while the original can only punch 1" from the edge of your material. The great majority of our holes are punched with the original, but sometimes we need that 6" reach.

There is one style of book, a quasi-longstitch, for which we use the Crop-A-Dile I to punch holes in signatures (a group of pages). But, for most styles of books we use an awl for this job. However, it could be used to punch holes in pages of other book styles too. Just depends on what you like.

With our Crop-A-Dile I we have punched tens thousands of holes in book board and leather. And it's still going strong.

Japanese screw punch
Another tool is the Japanese screw punch. Some bookbinders really love it. It looks much like a hollow punch, but instead of hitting it hard, you push down, and as you push, it twists on a screw, increasing its punching power.


Leather hole punch
One final hole making tool is a leather hole punch. We don't use one, but only because we don't have one, and only because we have a Crop-A-Dile.


Anything to add to the discussion? Please leave a comment.