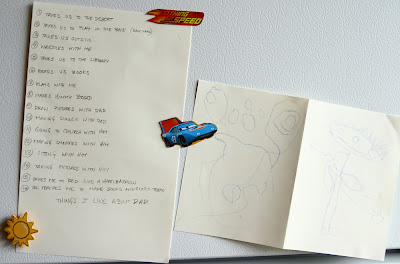
I hope everyone had a great father's day! I wrote this all down as Jadon (4 years old) said things that he liked about his dad. My intent was to try and get him to go to 10 but he kept on going so I kept on writing. If it's hard to read, you can click on the photo to make it larger.
Monday, June 20, 2011
Saturday, June 18, 2011
Summer time!
This photo is from last summer. Forever ago. Ethan didn't really like the pool so much last year and would only stay in a few minutes at a time. I think he'll change his mind about swimming this year (at least the swimmer in me hopes so). I'm so glad that the warm weather has finally come back!
Friday, June 17, 2011
Carving out Letters in Bookboard
It takes forever.
This was a commission during the busy Christmas season. It was a portfolio for a writer in New York.
For those interested in the process, I drew the letters on in pencil, used my scalpel and xacto knife to carve out the letters and then I tooled in the leather to the letters when I covered the board. The letters are about 1" tall and the lines of the letters needed to be slightly bigger than the thickness of my bonefolder so I could push the leather down into them.
Thursday, June 16, 2011
Selling Your Handmade Books: The Checklist
Originally posted on the Bookbinding Team Blog: http://www.bookbindingteam.com/
We're adding to the checklist today. If you've been selling online already, you might still find that setting up some of these checklist items might be worth doing!
Once you have decided what your shop name will be, the products you will sell, and what level you'd like to work at, you are ready to get set up to sell!
There are four accounts that you need to set up for your small online business. Here are numbers 4-7 for the big checklist.
#4- Email: You may have a personal email that you've been using for years. If you are working at hobby level, this might be all you need to keep things together in one place. However, if you decide to go part time or full time with this business venture, I suggest getting a separate email account. This will help you keep the business separate from your personal emails. If you want to just keep your personal, I suggest setting up three folders in your personal account so you can keep all the Etsy info separate. The three folders I suggest starting with are: Etsy Invoices, Etsy information and Etsy emails. Etsy sends out emails everyday that you can opt into. One is Etsy Success, another is Etsy finds. If you want to learn a lot about the handmade business online, I suggest signing up for Etsy Success emails. Etsy Finds is an email sent out to buyers and puts Etsy's products out there to bring in potential buyers. It's way fun to look at these emails and way exciting to see one of your products in them! They have other subscriptions too that you can sign up for by clicking here.
#5- Bank Account: I set up a separate checking account for my business. It's just a separate free checking account through a local bank. This helps me keep the finances separate. If you're at hobby level and plan on staying there, you might be ok just using your personal account if you have one set up. However, it is super nice at tax time to have everything separate. If you have a debit/credit card associated with the new checking account, you can use that for all supply purchases and quickly see, on your monthly banking statement, how much money has gone into your various business expenses.
#6- PayPal Account: Etsy currently uses PayPal as their best option for purchasing items from Etsy. I know they would like to set up a monetary system with checkout right inside of Etsy and it's in the works, but it will be a very big move for Etsy, and therefore will take a lot of time in setting up. There are other options to use but most of Etsy users will opt for PayPal and it's best to accommodate your customers as much as possible in this way by setting up the payments to come through PayPal. So for now, you need to set up a PayPal account. There are three types of PayPal accounts: personal, premiere and business. For selling online, we only need the premiere account. Sign up by clicking here. You'll need to connect this account to your bank account; the sign in process takes you step-by-step through the process.
We're adding to the checklist today. If you've been selling online already, you might still find that setting up some of these checklist items might be worth doing!
Once you have decided what your shop name will be, the products you will sell, and what level you'd like to work at, you are ready to get set up to sell!
There are four accounts that you need to set up for your small online business. Here are numbers 4-7 for the big checklist.
#5- Bank Account: I set up a separate checking account for my business. It's just a separate free checking account through a local bank. This helps me keep the finances separate. If you're at hobby level and plan on staying there, you might be ok just using your personal account if you have one set up. However, it is super nice at tax time to have everything separate. If you have a debit/credit card associated with the new checking account, you can use that for all supply purchases and quickly see, on your monthly banking statement, how much money has gone into your various business expenses.
#7- Etsy Account: Your Etsy seller account is the final account to sign up with because you'll need the email, credit/debit from your bank account and your PayPal account to sign up for an Etsy seller account. These things can be changed later through Etsy in your account settings. It's always nice to just enter these things in once though. Some of my students had a hard time finding where to start their shop. There's a "Sell" button on the top of Etsy's pages, you can click on that and it takes you to the Seller's page. Once there you'll need to look on the right side of the page first for a blue sign up button and then a green Start Selling button. If you ever get stuck in this, click on the Sell button and look to the right side of the page.
Wednesday, June 15, 2011
Selling Your Handmade Books: The Checklist
This post was originally posted on June 7th on the Bookbinding Team Blog at http://www.bookbindingteam.com/
I recently taught a local class on how to sell handmade items on Etsy.com. It was requested by many wonderful crafters in my area, so I left my bookbinding tools at home and went to work with this wonderful group. The goal of the class was to have them set up their business by the end of the six week class. I created a check list for starting and operating a small business. The checklist is basically a list of questions to ask your self, or things to do to set your business in a path for success. For the next several weeks, you'll receive some of the tips I shared in that class.
I recently taught a local class on how to sell handmade items on Etsy.com. It was requested by many wonderful crafters in my area, so I left my bookbinding tools at home and went to work with this wonderful group. The goal of the class was to have them set up their business by the end of the six week class. I created a check list for starting and operating a small business. The checklist is basically a list of questions to ask your self, or things to do to set your business in a path for success. For the next several weeks, you'll receive some of the tips I shared in that class.
Check list numbers 1-3
1- What are you going to create to sell to others?
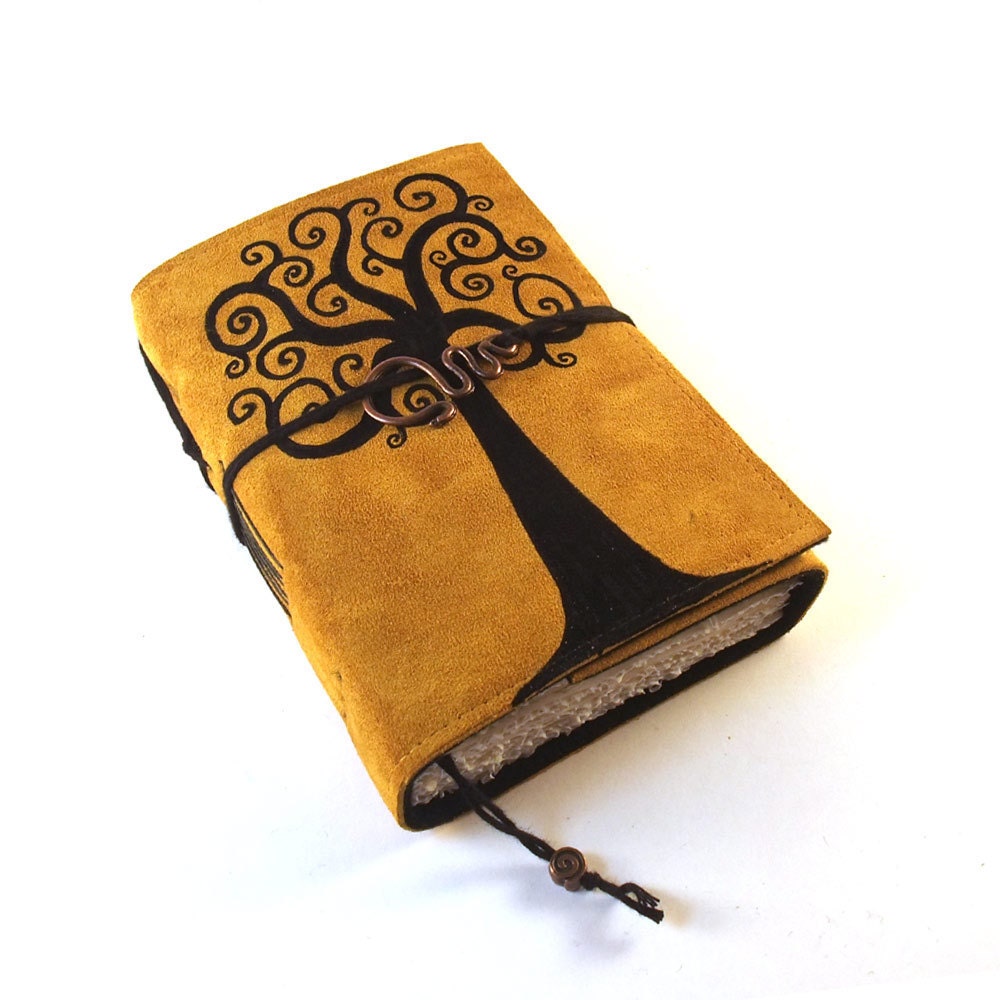
This encourages other questions such as, would you like to create one-of-a-kinds, one item in a variety of colors? Or would you like to create several types of things: books, jewelry, aprons, furniture? Write down what you want to make to sell, not just everything you can create. Be specific with colors, sizes, and the materials you want to use. Be original! Don't go on etsy and browse and say "I'll make what they're making." Find something that shows others a bit of you. Find your niche and create your own! For example: I know that when I see this book below, it comes from Renate of Kreativlink.etsy.com as she's know for her felt soft cover books in which she hand draws fun designs, one design being this famous
swirled tree.
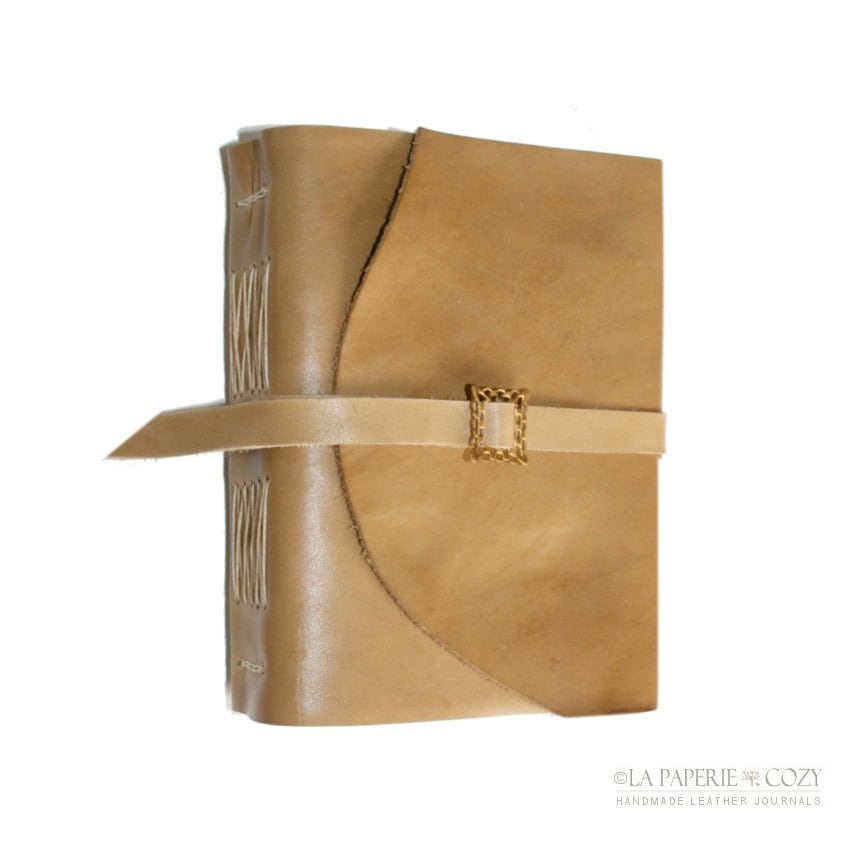
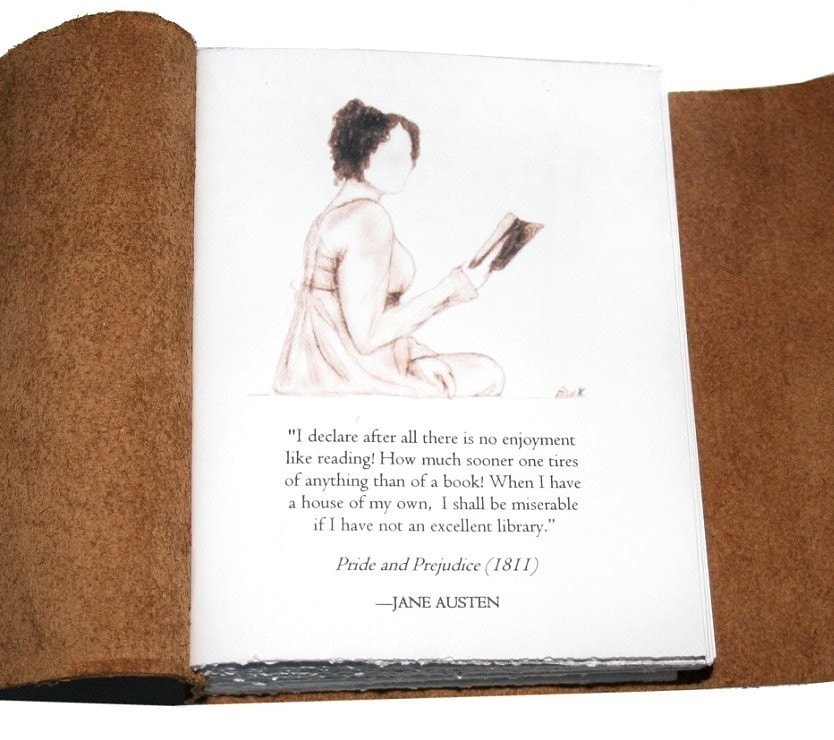
And I know if I see one of these longstitch books below with a fabulous quote in the front, it's from Beverly of lapaperie.etsy.com as she's known for the quotes on the first page of her books.
Making books is great, but try and find your own style and niche.
2- What level do you want to work at?
Pick the level you want to open up shot at and the level you might consider moving up-to, or down-to some day. This is important as it sets your mind and goals in the right direction for your business. I wrote a post on this over a year ago which can be read by clicking here but the levels are listed below.
Hobby Level - You love making books and want to continue but materials can sometimes be pricey. At the hobby level, you really just want to make back enough money to cover costs and help pay for future materials for more books. All your money goes directly back into the books and your creative ventures.
Side Income Level - Since you're in need of a bit of extra income and you really don't want to sacrifice making books to get a second job, you've turned to selling your handmade books in hopes that you can do what you love and still contribute money to the monthly cash inflow.
Full Time Level - You love making books and want to make it your full time job. Part of your sales income will go back to materials for books, with most of the income going toward your spending budget to pay off bills and living costs.
3- Pick a shop name.
For most of you reading this post, you may already have a shop name. I encourage you to leave a comment about your shop name and why you picked it. If you had to choose again, would you pick the same name?
For those who don't have a shop name yet, this may be the hardest thing you have to do on the checklist. Here are some tips to picking a name: Keep it simple, keep it short and keep it relevant. When I started out a few years ago on Etsy, I wasn't sure what I wanted to sell. I thought I'd just add things here and there to my shop and see what took off. The first item we sold on there: two dozen cinnamon rolls.
Daniel made them. They look scrumptious don't they? We quickly learned that cinnamon rolls were NOT what we wanted to sell after trying to figure out the timing to ship and the packaging. Good thing I didn't call the shop "Cinnamon Sweets" which was on my list of potential shop names. I would be selling handmade journals and photo albums under that name!
I chose a shop name in which I could add anything I wanted to my shop: Karleigh Jae. However, my name is spelled in a complicated way. Yes, compliments to my mom for a pretty spelling but it's not the best for an online business. I have to spell my website out for anyone who asks and for my customers, they have the hard time of telling friends, when they get a compliment on their new journal, "I bought it off etsy, her name is Karleigh Jae but I forget how it's spelled." Word of mouth is the best advertising for anyone, so make sure your shop name is easy to pass around as not everyone will have a business card on hand!
Also remember to keep it simple. Apple. Gap. Kraft. Nike. These are brand names that kept it simple and they are therefor easy to remember. I had a student who wanted to use something like "Rose Maria's handmade treasured gifts". Think about your customers who want to come directly to your shop. They have to type that long name in! It's also easily forgettable. However, think Calvin Klein. Wouldn't it be weird if it were: "Calvin Klein's Fashionable Clothes and Accessories For Men"? Let's see them fit that on the clothing tag!
I suggested that she shorten her shop name to Rose Maria. I had all the students try and come up with they way they would spell that name and they all spelled it the same way, compared to my name of Karleigh Jae (everyone always starts it with "C" and let's not even discuss the "eigh" part). Ask friends for shop name ideas if you are having a hard time coming up with a name and remember to keep it simple, short and relevant.
One more note about my shop name. I picked my own name because it was just something I was trying out and I didn't know what I wanted to sell. Difficult spelling put aside, I still wouldn't have picked it. Currently, my etsy shop is working on the full time level and my husband, Daniel actually puts in more time with it than I do (he even made the first thing that sold, remember the cinnamon rolls?) But, the shop is still in my name. So, I wish I had picked a name which allowed everyone to know right off that it's not just a one woman business but a husband and wife team. If I had picked the hobby level and stayed there, my name would be ok. For a business that I planned on growing, I should have thought on my name a bit more.
The checklist is super long so keep up with my Tuesday posts here or on the BEST blog to grow your business!
Thursday, June 9, 2011
Coptic Stitch Class at Provo Art & Frame
The class is Tuesday from 6-8:30pm at the Studio above Provo Art & Frame. Please contact me if you plan on attending!
The Ethiopian coptic stitch dates back to the 4th century. It's a beautiful book with an exposed spine in which you can see the sewing of the pages. The coptic stitch book will open flat for maximum use of the pages. It works great for sketchbooks, photo albums and journals. It's also a nice book for recipes because you don't have to hold it open while cooking in the kitchen and it works great as a wedding guestbook too!
The Ethiopian coptic stitch dates back to the 4th century. It's a beautiful book with an exposed spine in which you can see the sewing of the pages. The coptic stitch book will open flat for maximum use of the pages. It works great for sketchbooks, photo albums and journals. It's also a nice book for recipes because you don't have to hold it open while cooking in the kitchen and it works great as a wedding guestbook too!
All levels of expertise welcome including beginners! Ages 10+ for this class.
Class fee is $25 which includes all the materials you'll need for the book you make and keep!
If you'd like to attend the class, please sign up by emailing me at KarleighJae@gmail.com
Please bring the following tools:
Pencil
Cutting mat (or old magazine to cut on)
x-acto type craft knife or utility knife
Scissors
Metal Edge Ruler
Bonefolder (available at Provo Art & Frame, ask or a student discount for taking my class!)
Subscribe to:
Posts (Atom)


