Showing posts with label Book Art Related Posts. Show all posts

Tuesday, November 6, 2012

Bookbinding Now: Have you been listening to these podcasts?

I have. And I think they are absolutely wonderful. We live in the middle of the rural Western United States and I must say, there are not many bookbinders in our area. For me to be able to connect to other bookbinders through the internet is such a blessing!

My newest love has been Bookbinding Now which is a series of interviews with people who are involved in anything book art related. I find myself connecting with certain book artists and saying out loud, "Me too!" or "That's exactly how I view my own approach to books."


Visit Bookbinding Now to listen to past interviews and upcoming ones. They come out every other Wednesday. I look forward to each of them!

A big thanks to Susan Mills for her wonderful contribution to the book arts world with Bookbinding Now. You can also make a donation to Susan for these amazing podcasts which will help to keep them coming!


Wednesday, May 30, 2012

L.A. Workshop - Recap

Our recent Book Art Workshops in L.A. was so much fun.


We taught Box Making, Cordbound Books, Raised and Inset Designs in Paper, Fabric and Leather, Exposed Spine Bindings such as the Ethiopian Double Needle Coptic Stitch, Secret Belgian Binding and an Accordion Spine Book, and our 10 Book Workshop.

Kelly Kilmer came with her amazing Expressions Journaling Class and Karleigh is now an enlightened journaler (more on this to come!)

We also had so much fun with Jeannine Stein's classes in which she taught us to make booklaces and create beautiful books using cabinet cards and the romanesque stitch.

Karleigh lost her voice which was down to just a whisper by Thursday morning so Daniel filled in for the last three days of classes. While we had several students come to individual classes, we had three amazing women come to the entire week. Congrats to Amy Spencer, Regina Franchi, and Jessica Meyers for surviving and entire week of intense book arts! They created gorgeous books and it was so fun for us to see everything that was designed and made during these classes. We also had great treats thanks to Regina, Amy and Jeannine! And we had a bit of fun eating out at a few places while we were there. The Pie Hole was amazing and highly recommended (Get the Chicken Pot Pie, skip the Salad).

Some of my favorite quotes from the week:

Jeannine Stein: "That's why we make books, so we can eat cupcakes." She brought some scrumptious cupcakes from Crumbs.

Kelly Kilmer: "Messy tables just mean we are having fun!"

Kelly Kilmer: "You can't mess it up. Just keep going.

Amy Spencer: "I need to find something fancy to wear with this booklace." I love that an outfit was designed around a miniature book. She found something a bit dressy to wear with it during the week.

Jeannine Stein: "There are no mistakes, only design elements."

Daniel: "Karleigh, come drink this Cayenne." (Yes. I did. And No. It didn't help my voice come back.)

Amy and Jessica deciding on which dessert to get at the Pie Hole: "Let's just get all of them."

We tried the Blueberry Cheesecake Pie, Mexican Hot Chocolate Pie, Maple, Lemon Merengue and (a brownie-ish chocolate one that was extremely rich tasting). We all had different favorites. Thanks to Amy and Jessica for treating us!

Thursday, February 16, 2012

The Bonefolder's Final Issue

The Bonefolder, an e-journal for the bookbinder and book artist was an online periodical that was started back in 2004 and was published as a free download via the internet. The last issue was released in January 2012.

It's sort of like washing your car and then it rains. I just got a new computer that could handle downloading the Bonefolder Issues and now they've stopped publishing them. I will admit that I was a tad heart broken.

However, Peter Verheyen gives us hope for keeping things alive like the Bind-o-rama and the Book Arts Web. You can listen to an interview about the closing of the Bonefolder with Peter Verheyen and Karen Hanmer who was an editor for the Bonefolder. It was nice to hear Karen's voice again and put a smile on my face after the slightly devastating news of the release of the final issue.

Friday, December 23, 2011

One Very Large Portfolio

This portfolio in black leather is about 17.5" x 26" 

Last book on my forever long to-do list before shutting
down shop for Christmas!

Grey Handmade Lokta Paper from Nepal was used for the
inside of front and back covers, the pages are not yet added.

Screw Post Binding which lays flat when open,
the pages are not yet added

Raised name in the leather which not only looks nice
but you can't help but run your hands over it to feel it!

That's a 12" ruler sitting on top of that portfolio

Paul Scott Page is a photographer that commissioned this work. He creates beautiful images of seemingly ordinary things. This particular portfolio will hold images of large spaces which really call to be printed and viewed in this larger format. 

To view Paul Scott Page's work you can visit his website at PaulScottPage.com 

One of my favorite images is called "metro arteries"; see if you can find it!

Monday, November 14, 2011

New Steampunk Journals

We had a request for a couple of large 9 x 12 steampunk books and decided to do about 10 small books to give the client a few options of different antiques and styles. These are the first three of the ten books which are available in our  Etsy Shop.


Thursday, November 10, 2011

Custom Order for Christmas

Custom orders for the holidays are already coming in. 

This album was a custom order for a Christmas present last year by a wonderful return customer. She gave it to her mother-in-law who has a lot of Disneyland memorabilia.

Purple Leather was requested for the cover
A Disneyland E ticket was used for the inset on the front cover
Sewn onto cords for a traditional look.
The end papers front and back came from two
different disneyland maps. These were really fun for me to
look at as I've never been to Disneyland myself. 


I'm excited to see what custom orders we'll be making for this year's Christmas.

Saturday, November 5, 2011

Custom Order - Our Adventure Album

This was a custom order request for an anniversary present. The letters and hinges are raised in the leather which is a rustic brown cowhide. I think I might make myself an adventure album someday too. 

You can see more details on the album or order one for yourself by clicking HERE.


Thursday, October 27, 2011

Rustic Albums, A Custom Order

This custom order was for a woman who had found some rough characters in her family history. She gathered their information, stories and photos and we made these rustic albums for her. 


We antiqued the leather by hand, spending hours stripping the original hide. We learned our lesson on that one. We'll always start with a hide that is either very easy to strip the sealant off or just use a hide that has not been sealed. We then hand colored the leather and stained it to make it look older and then sealed it with wax. The results were great. The hide went perfectly with the Rives BFK Cream paper that was used for the inside. We also printed out title pages for each person she was giving the book to. 


A note from the gift giver:

"I just wanted to let you know how much everybody loved the albums.  There were tears all round when they opened them and this with five of the six being 20-something year old boys.  Of course my 92 year old aunt and 84 year old Mom loved getting to point out the relatives they remembered and tell the family stories.  Everybody loved the leather and the way the paper and binding worked with the old photos.  I had printed the pictures in sepia tones and the finished products really hang together nicely.  
These albums are something very special and they would not have happened without your husband's and your creativity and skill.  Thank you."


Monday, October 24, 2011

Custom Order - Printing on Handmade Paper

This was for a wonderful return customer. She makes me smile with her praising comments on our albums. I love getting her emails. 

She requested a yellow leather, raised hinge spine with handmade paper on the cover. After giving her a few options of handmade papers, she chose this gorgeous one that was handmade in Thailand and has plant inclusions. 


She wanted the names "Leo & Ella" printed on the cover. But, this type of paper doesn't go through the printer well. So I suggested we inset the names. I originally had planned on printing the names on natural lokta and then insetting the lokta piece. When I pulled out the lokta next to this handmade paper, it didn't go well. The colors clashed a bit too much for my liking. So I daringly sent a piece of the inclusion paper through the printer. The parts on the paper where stems and leaves were raised led to black ink being smeared across it. However, the part where "Leo & Ella" was printed ended up being just fine as it was a bit smoother than the rest of the paper. So, I cut that part out and inserted the paper with names onto the rectangle I had carved out and inset it on the front cover.  

I think it turned out beautifully and was very happy with this one.

Wednesday, August 24, 2011

A Custom Order

This photo album was custom ordered by Sarah in Australia for an anniversary present to her husband. They've taken photos of him standing next to large landmarks (big pineapples and such) and this album is to hold those photos.

All the lettering and design was burned in by hand. Leather is a rustic hickory brown lambskin. You can click on the photos to see them larger.


Friday, July 1, 2011

Teaching and Traveling

I taught at the Focus on Book Arts Conference last week. So. Much. Fun.

Two of my room mates and fellow teachers gave me a total ab workout from laughing so much. Thank you Karen Hanmer and Peggy Johnston for the constant laughs and wonderful inspiration.

I taught a class on Raised and Inset Designs. The students created beautiful book covers. Here are a few snapshots of the class.

Ok, this isn't really from the class. It's just one of the samples I created for it. The gears were raised on the leather spine and the metal gears on the paper were to be placed in the inset on the book cover. The leather is being antiqued at this point.

Beautiful orange bookcloth with inset metal medallion.

The zebras were inset on the bottom and the raised design on top mimics the zebras stripes.

Action snapshot of the classroom.
I'll update again with more photos and telling tales from my trip.

Friday, June 17, 2011

Carving out Letters in Bookboard

It takes forever. 

This was a commission during the busy Christmas season. It was a portfolio for a writer in New York. 

For those interested in the process, I drew the letters on in pencil, used my scalpel and xacto knife to carve out the letters and then I tooled in the leather to the letters when I covered the board. The letters are about 1" tall and the lines of the letters needed to be slightly bigger than the thickness of my bonefolder so I could push the leather down into them. 


Thursday, June 16, 2011

Selling Your Handmade Books: The Checklist

Originally posted on the Bookbinding Team Blog: http://www.bookbindingteam.com/

We're adding to the checklist today. If you've been selling online already, you might still find that setting up some of these checklist items might be worth doing!

Once you have decided what your shop name will be, the products you will sell, and what level you'd like to work at, you are ready to get set up to sell!

There are four accounts that you need to set up for your small online business. Here are numbers 4-7 for the big checklist.


#4- Email: You may have a personal email that you've been using for years. If you are working at hobby level, this might be all you need to keep things together in one place. However, if you decide to go part time or full time with this business venture, I suggest getting a separate email account. This will help you keep the business separate from your personal emails. If you want to just keep your personal, I suggest setting up three folders in your personal account so you can keep all the Etsy info separate. The three folders I suggest starting with are: Etsy Invoices, Etsy information and Etsy emails. Etsy sends out emails everyday that you can opt into. One is Etsy Success, another is Etsy finds. If you want to learn a lot about the handmade business online, I suggest signing up for Etsy Success emails. Etsy Finds is an email sent out to buyers and puts Etsy's products out there to bring in potential buyers. It's way fun to look at these emails and way exciting to see one of your products in them! They have other subscriptions too that you can sign up for by clicking here.


#5- Bank Account: I set up a separate checking account for my business. It's just a separate free checking account through a local bank. This helps me keep the finances separate. If you're at hobby level and plan on staying there, you might be ok just using your personal account if you have one set up. However, it is super nice at tax time to have everything separate. If you have a debit/credit card associated with the new checking account, you can use that for all supply purchases and quickly see, on your monthly banking statement, how much money has gone into your various business expenses.


#6- PayPal Account: Etsy currently uses PayPal as their best option for purchasing items from Etsy. I know they would like to set up a monetary system with checkout right inside of Etsy and it's in the works, but it will be a very big move for Etsy, and therefore will take a lot of time in setting up. There are other options to use but most of Etsy users will opt for PayPal and it's best to accommodate your customers as much as possible in this way by setting up the payments to come through PayPal. So for now, you need to set up a PayPal account. There are three types of PayPal accounts: personal, premiere and business. For selling online, we only need the premiere account. Sign up by clicking here. You'll need to connect this account to your bank account; the sign in process takes you step-by-step through the process.


#7- Etsy Account: Your Etsy seller account is the final account to sign up with because you'll need the email, credit/debit from your bank account and your PayPal account to sign up for an Etsy seller account. These things can be changed later through Etsy in your account settings. It's always nice to just enter these things in once though. Some of my students had a hard time finding where to start their shop. There's a "Sell" button on the top of Etsy's pages, you can click on that and it takes you to the Seller's page. Once there you'll need to look on the right side of the page first for a blue sign up button and then a green Start Selling button. If you ever get stuck in this, click on the Sell button and look to the right side of the page.

Wednesday, June 15, 2011

Selling Your Handmade Books: The Checklist

This post was originally posted on June 7th on the Bookbinding Team Blog at http://www.bookbindingteam.com/

I recently taught a local class on how to sell handmade items on Etsy.com. It was requested by many wonderful crafters in my area, so I left my bookbinding tools at home and went to work with this wonderful group. The goal of the class was to have them set up their business by the end of the six week class. I created a check list for starting and operating a small business. The checklist is basically a list of questions to ask your self, or things to do to set your business in a path for success. For the next several weeks, you'll receive some of the tips I shared in that class.

Check list numbers 1-3

1- What are you going to create to sell to others?

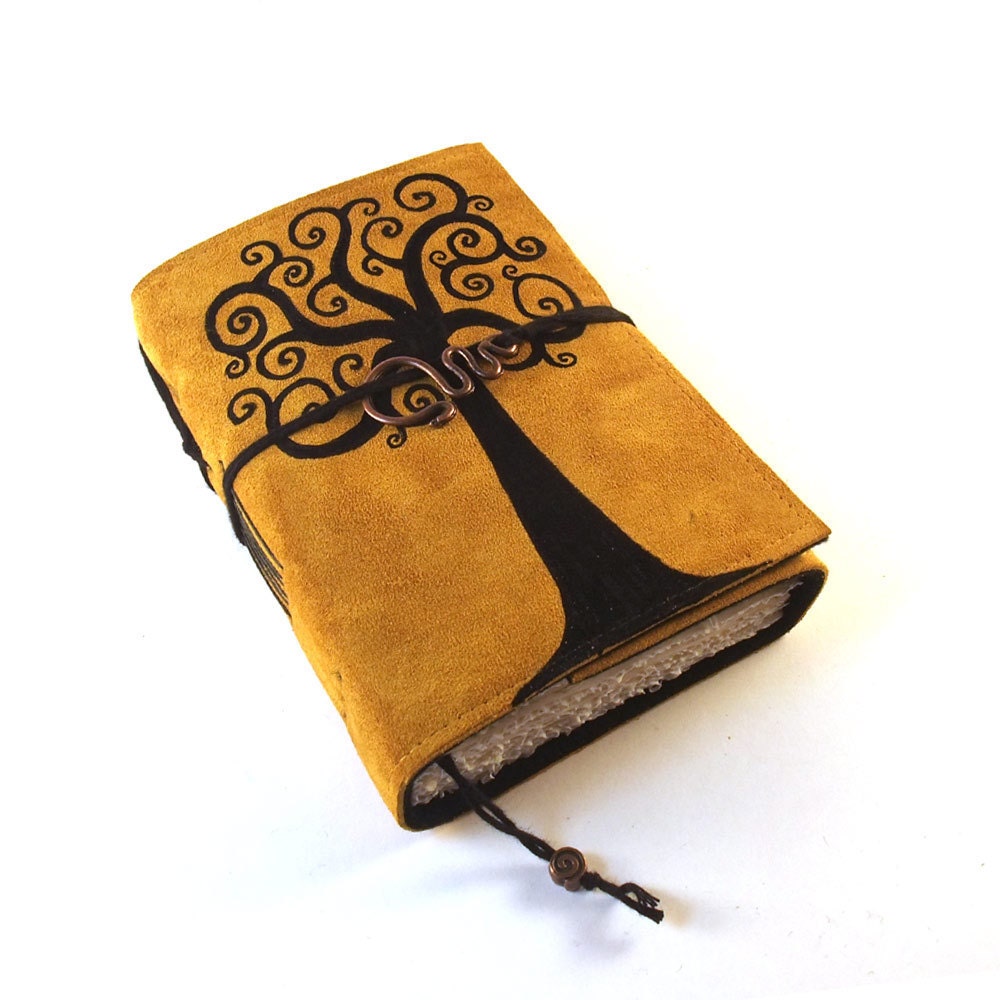
This encourages other questions such as, would you like to create one-of-a-kinds, one item in a variety of colors? Or would you like to create several types of things: books, jewelry, aprons, furniture? Write down what you want to make to sell, not just everything you can create. Be specific with colors, sizes, and the materials you want to use. Be original! Don't go on etsy and browse and say "I'll make what they're making." Find something that shows others a bit of you. Find your niche and create your own! For example: I know that when I see this book below, it comes from Renate of Kreativlink.etsy.com as she's know for her felt soft cover books in which she hand draws fun designs, one design being this famous
swirled tree.


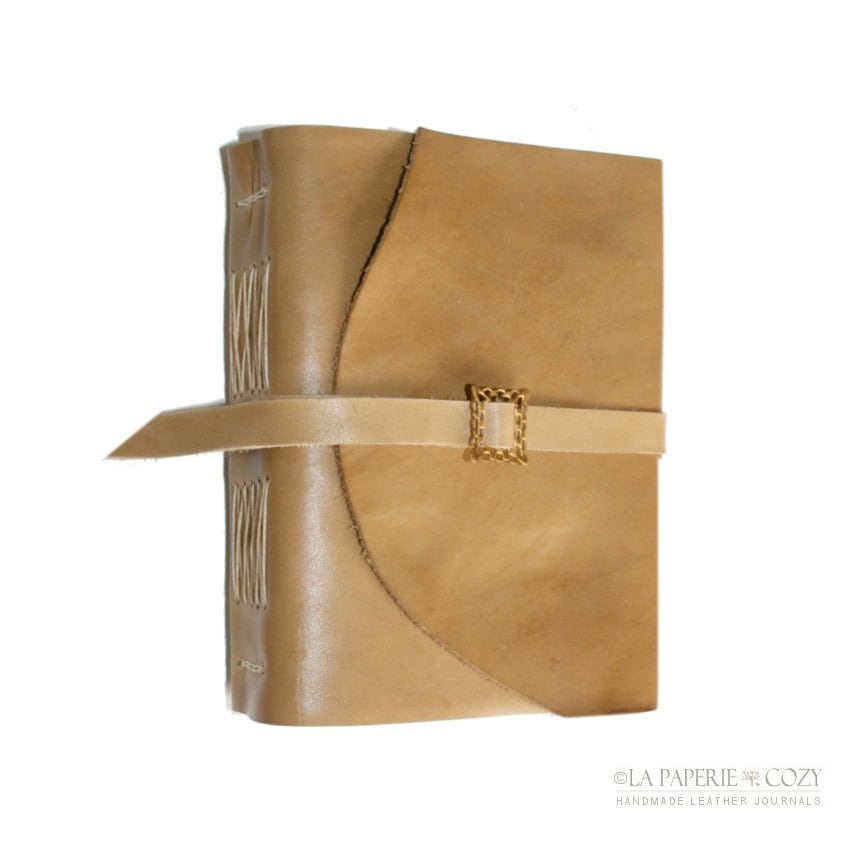
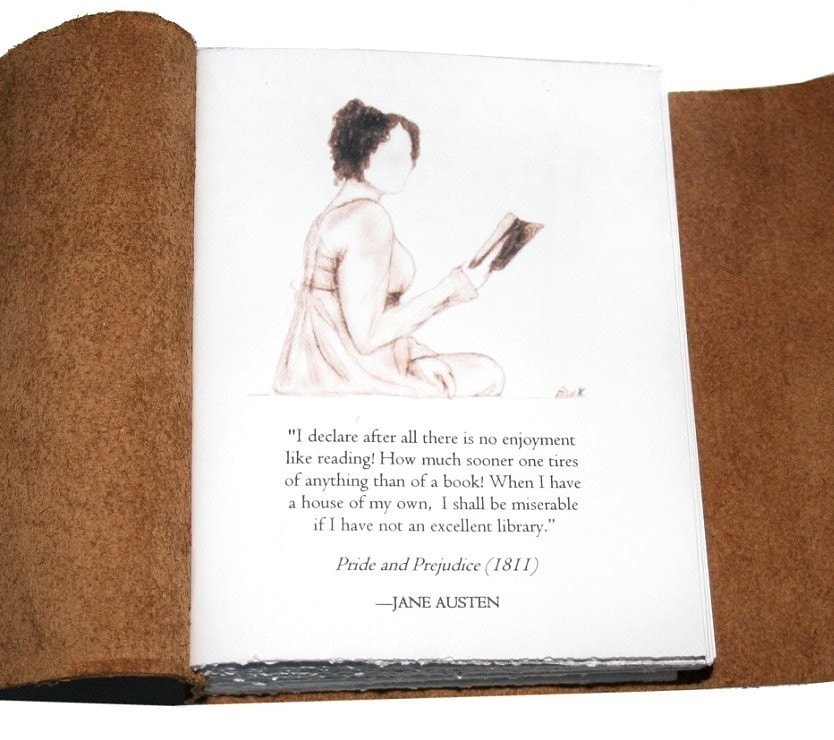
And I know if I see one of these longstitch books below with a fabulous quote in the front, it's from Beverly of lapaperie.etsy.com as she's known for the quotes on the first page of her books.

Making books is great, but try and find your own style and niche.


2- What level do you want to work at?

Pick the level you want to open up shot at and the level you might consider moving up-to, or down-to some day. This is important as it sets your mind and goals in the right direction for your business. I wrote a post on this over a year ago which can be read by clicking here but the levels are listed below.

Hobby Level - You love making books and want to continue but materials can sometimes be pricey. At the hobby level, you really just want to make back enough money to cover costs and help pay for future materials for more books. All your money goes directly back into the books and your creative ventures.

Side Income Level - Since you're in need of a bit of extra income and you really don't want to sacrifice making books to get a second job, you've turned to selling your handmade books in hopes that you can do what you love and still contribute money to the monthly cash inflow.

Full Time Level - You love making books and want to make it your full time job. Part of your sales income will go back to materials for books, with most of the income going toward your spending budget to pay off bills and living costs.

3- Pick a shop name.

For most of you reading this post, you may already have a shop name. I encourage you to leave a comment about your shop name and why you picked it. If you had to choose again, would you pick the same name?

For those who don't have a shop name yet, this may be the hardest thing you have to do on the checklist. Here are some tips to picking a name: Keep it simple, keep it short and keep it relevant. When I started out a few years ago on Etsy, I wasn't sure what I wanted to sell. I thought I'd just add things here and there to my shop and see what took off. The first item we sold on there: two dozen cinnamon rolls.


Daniel made them. They look scrumptious don't they? We quickly learned that cinnamon rolls were NOT what we wanted to sell after trying to figure out the timing to ship and the packaging. Good thing I didn't call the shop "Cinnamon Sweets" which was on my list of potential shop names. I would be selling handmade journals and photo albums under that name!

I chose a shop name in which I could add anything I wanted to my shop: Karleigh Jae. However, my name is spelled in a complicated way. Yes, compliments to my mom for a pretty spelling but it's not the best for an online business. I have to spell my website out for anyone who asks and for my customers, they have the hard time of telling friends, when they get a compliment on their new journal, "I bought it off etsy, her name is Karleigh Jae but I forget how it's spelled." Word of mouth is the best advertising for anyone, so make sure your shop name is easy to pass around as not everyone will have a business card on hand!

Also remember to keep it simple. Apple. Gap. Kraft. Nike. These are brand names that kept it simple and they are therefor easy to remember. I had a student who wanted to use something like "Rose Maria's handmade treasured gifts". Think about your customers who want to come directly to your shop. They have to type that long name in! It's also easily forgettable. However, think Calvin Klein. Wouldn't it be weird if it were: "Calvin Klein's Fashionable Clothes and Accessories For Men"? Let's see them fit that on the clothing tag!

I suggested that she shorten her shop name to Rose Maria. I had all the students try and come up with they way they would spell that name and they all spelled it the same way, compared to my name of Karleigh Jae (everyone always starts it with "C" and let's not even discuss the "eigh" part). Ask friends for shop name ideas if you are having a hard time coming up with a name and remember to keep it simple, short and relevant.

One more note about my shop name. I picked my own name because it was just something I was trying out and I didn't know what I wanted to sell. Difficult spelling put aside, I still wouldn't have picked it. Currently, my etsy shop is working on the full time level and my husband, Daniel actually puts in more time with it than I do (he even made the first thing that sold, remember the cinnamon rolls?) But, the shop is still in my name. So, I wish I had picked a name which allowed everyone to know right off that it's not just a one woman business but a husband and wife team. If I had picked the hobby level and stayed there, my name would be ok. For a business that I planned on growing, I should have thought on my name a bit more.

The checklist is super long so keep up with my Tuesday posts here or on the BEST blog to grow your business!

Tuesday, May 24, 2011

Thoughts on Teaching


This is my littlest one, Ethan painting. I didn't have to show him how, I just had to make sure he didn't squeeze too much paint onto the painting. I let him once, squeeze to his heart's content, and he was very upset that a pile of yellow sat on his painting. So we had to scoop it off onto his palette which made him happy again. It would be wonderful if all painters could be as content when they scraped off their unwanted painting.


I've been doing an Etsy Workshop with some wonderful people in the area here. I've grown use to teaching bookbinding and so this Etsy class has been rather difficult for me. It's a learning process. I'll be teaching it again in the Autumn through Snow College's Continuing Education Program and I'm just starting to know how to deal with all the aspects of Etsy and Business for a 5 week course. I'm also contemplating a creative journaling class. I love teaching because I love seeing what others create and I learn a lot! It's been said that teaching is a gift to others but really, it's a totally selfish venture of mine.

Monday, May 23, 2011

Found the yellow book photo!

Here's that book photo I couldn't find this morning, along with a few other photos of the 9" x 12" book. For those not going by the crazy system of the U.S. it's about 23 x 30 cm.